Wednesday, October 23, 2013

Funfetti Cupcakes

One of my deepest and darkest secrets is that........I love love LOVE boxed cake mix. I'm just slightly embarrassed to admit it, since I usually make everything from scratch, but there's just something so nostalgic about it. The memories of my childhood and my first baking adventures flood my mind whenever I sink my teeth into the fluffy and moist cake. So I thought that I would bring myself back to the good ol' days, but raise the ante by baking Funfetti cupcakes from scratch! 


This particular recipe is pretty simple to make. It is vanilla cake made with egg whites which create a lighter cake. I used regular rainbow sprinkles or jimmies in my batter but you can use any type of sprinkles or nonpareils you want. Also, instead of pairing these cute cakes with a boring vanilla buttercream I thought that I would make it a bit more interesting and top it off with a delicious and simple strawberry buttercream. With the buttercream, I whipped up a simple American buttercream and added about 1/4 cup of pureed strawberries. The strawberries added just the right amount of tartness to balance out the sweetness of the powdered sugar.


I love just how cute these cupcakes are!  The rainbow sprinkles peaking out of the white cake are so festive. They're perfect for a child's birthday party for even for an office party. After all, cupcakes are perfect for any occasion.

Recipe Review:

Taste: The cake itself is not too sweet and you can't really taste the sprinkles themselves, but it adds a bit of a crunch, for lack of a better word. The strawberry is very prominent in the buttercream and the buttercream itself is smooth and creamy.
Texture: The cake is so fluffy because of the egg whites. It's also extremely moist from the addition of buttercream. However, you can always just use regular milk but it won't result in such a moist cake.
Level of difficulty: This is quite possibly the easiest cupcake recipe to make. It is a standard cream the butter and sugar and add the wet and dry ingredients after kind of recipe. The buttercream is even more simple. All there is to do is cream all the ingredients together. 
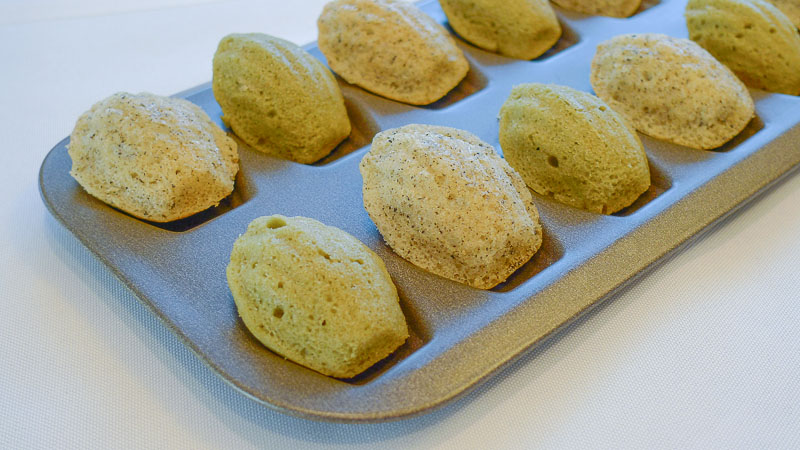
Appearance: The exterior of the cake is a nice and light golden yellow. The interior is beautifully off-white and has a plethora of rainbow sprinkles poking through. 


Funfetti Cupcakes 
makes approximately 20 standard sized cupcakes
adapted from Stephanie 

Funfetti Cake
ingredients:
2 ¼ cups cake flour
1 tablespoon baking powder
½ teaspoon salt
1 ¼ cups buttermilk (you can substitute this for regular milk)
4 large egg whites
1 ½ cups sugar
1 stick unsalted butter, at room temperature
1/2 teaspoon vanilla extract
1/4 cup rainbow sprinkles 

------------------------------------------------------------------------------------------
directions:
Preheat oven to 350°F and line a cupcake pan with cupcake liners.
 
In a large bowl, whisk together flour, baking powder, and salt and set aside.

In another bowl, whisk together buttermilk and egg whites and set aside. 
In a stand mixer, combine the butter and sugar and beat for 2 minutes, until pale and creamy. Then, mix in the vanilla extract. 

Alternate adding 1/3 of flour mixture and 1/2 of buttermilk mixture to mixing bowl, beating until just incorporated in between (begin and end with flour mixture). Beat for 1 more minute.

Add sprinkles and stir until distributed through batter.

Fill cupcake liners 3/4 full. Bake for 18-20 minutes, or until the cupcakes are golden brown. Let cool.
 

Strawberry Buttercream
ingredients:
2 sticks of unsalted butter, at room temperature
3 1/2 cups of powdered sugar, sifted 
1/4 fresh strawberry puree 
------------------------------------------------------------------------------------------
directions:
In a stand mixer, beat the butter on medium-high speed for about 3 minutes. You want it to be creamy and pale. Next, add in all the sifted powdered sugar. Turn the mixer on low to ensure that none of the sugar flies out of the bowl. Once it is mostly incorporated, add in the strawberry puree. Beat until thoroughly combined. 
Pipe the buttercream onto the cooled cupcakes however you wish to. As usual, I used an Ateco#827 tip. I find that it creates the nicest looking swirls. 

These cupcakes sold in in about 10 minutes when I brought them back to college. Not to mention, they got rave reviews. All my friends adored them and I'm sure you will to. I assure you, you won't be disappointed! 


As always, Happy Baking! 


Friday, September 6, 2013

Matcha Swiss Roll

Alright, you got me.

I'm obsessed with matcha.

Obsessed.

Maybe it's the mossy green color. Maybe it's the deep, musky flavor. Whatever it is, it's got me permanently hooked--and for good reason too. Matcha is a wonderful addition to any dessert you wish to make. It adds a great depth to everything and anything. What I have chosen to use with it this time is a matcha Swiss roll. 

  
Ah, good 'ol Swiss roll. I honestly never thought this day would come, where I would attempt to make a swiss roll. But alas, the day has finally arrived. And to my surprise, I made a wonderful discovery: SWISS ROLLS ARE REALLY NOT THAT HARD TO MAKE! :D So why I have always been so afraid to make them, I really do not know. It's probably the actually rolling of the cake; the fear that every inch of the delicate cake with crack and tear. However, if done properly, the cake will turn out just beautifully. 

As I was rolling the cake, my lungs almost collapsed from holding my breath in fear and anticipation. Please please please please please please PLEASE let this come out well. Please don't let this whole cake crumble into nothingness. Oh my.....oh my gosh.....did it work? It actually worked! Yes! I made a Swiss roll!!!!!!!

I made a swiss roll. Successfully.

What more can I say? I finally achieved something I've strayed away from for so long. None of the filling spilled out, the cake stayed in place, it had a nice shape, and it tasted absolutely delicious. A cake this good could only originate from a recipe that I borrowed from Keiko. Her recipes are flawless and so easy to follow. I will forever trust her expertise. 

  
She calls her recipe a Souffle Swiss Roll, which makes perfect sense because the end result is a cake that is so fluffy like a souffle. However, what makes this recipe extremely unique from those I've seen before is that this recipe includes a choux pastry. The overall process for the cake batter consists of three elements: choux pastry, meringue, and an egg yolk mixture. 

As usual, I've added a few of my own personal touches to the recipe. In this cake, I added matcha powder and toasted walnuts to the whipped cream filling. Who would've thought that walnuts pair so well with matcha? Looks like it's time for another recipe review. 


Recipe Review:

Taste: This cake is perfect for those of you who want dessert but don't have the biggest sweet tooth. The cake itself is just sweet enough to be called a dessert and the filling has enough sugar to make it taste more than just whipped up cream. The matcha is subtle, which doesn't make it taste bitter or dry.
Texture: So spongy and fluffy. The whipping of the egg whites really increase the fluffiness and sponginess of this cake. It is very moist and the walnuts add a nice crunchy texture to the dessert.
Level of difficulty: Although I previously said that Swiss roll really isn't that difficult to make, I wouldn't recommend a beginner make this cake. It can be a little hard to roll and can easily be over-baked which results in a dry and brittle cake. However, if baked the appropriate amount of time, it will be very easy to roll and assemble. Also, this recipe has many steps, which can be somewhat confusing.
Appearance: It's beautiful! A nice, tight roll with walnuts and whipped cream peaking out in every slice. This could easily be served in the most elegant of bakeries.


Matcha Swiss Roll
adapted from Keikos Cake 
makes 1 cake

Matcha Cake
ingredients:
a) 120g milk
    35g butter
    40g flour, sifted 
    70g egg, beaten

b) 70g egg yolk
    35g sugar

c) 120g egg white
    75g sugar

  
Filling
ingredients:
1 cup heavy cream
1-2 tablespoons powdered sugar, sifted 
1/2 cup walnuts, toasted and chopped
------------------------------------------------------------------------------------------
directions:

Matcha cake:
Prepare a 12x12 inch pan. (I used a Drommar 15x10 inch pan.) Coat the bottom of the pan with butter and line it with parchment paper. Set aside.  
a) Combine 80g milk with butter in a saucepan over medium-high heat. When the milk begins to boil, add the sifted flour all at once. Take the saucepan off the heat and stir the mixture until all the flour is incorporated. Mix until the batter has thickened slightly and has formed into a ball shape. If a thin film appears on the bottom of the pan, don't be alarmed. That is completely normal. 
Put the mixture into a separate bowl and gradually add the remaining 40g of milk, making sure to incorporate all the milk thoroughly. Once all the milk is incorporated, begin the same process with the beaten egg. Set the choux pastry aside.

b) In a clean bowl, whip the egg whites. Gradually add the sugar once the whites become foamy. Beat the egg whites until stiff peaks form. 

c) In another bowl, combine the egg yolks and the sugar. Beat the mixture until it becomes pale and thick. This might take a few minutes. 
Now that all three elements are done, it's time to combine them. First, preheat your oven to 325°F. Combine the choux pastry and the egg yolk mixture. Once that is thoroughly combined, add the meringue in thirds, making sure to fold in the meringue and not to deflate it. 
Spread the batter onto your prepared baking sheet and bake for 25-30 minutes. After baking, immediately remove the cake from the pan but don't remove the parchment paper. Let cool completely. 
Filling:
In a large bowl, combine the heavy cream and powdered sugar. Whip the mixture on high until stiff peaks are formed. Be careful not to over beat or you will make butter. Once stiff peaks are reached, fold in the chopped walnuts. 


Assembly:
Remove the parchment paper from the cake and place the cake on a new sheet of parchment. Spread the filling over the cake. Now it's time to roll the cake. With the short end facing you, make a small roll. Then, holding the tips of the parchment paper, slowly roll up the rest of the cake. The parchment paper should be used to push the cake and roll it. Wrap the cake with the parchment and 'tie' up the ends, like a hard candy. Place it in the fridge to set for about 45 minutes.


So as you can see, a Swiss roll really isn't that complicated to make. Although there may be a few steps to take, it generally is a pretty easy cake to make. If you're afraid to come face-to-face with a Swiss roll like I used to be, well my best advice for that is, don't be. One day, you'll have to overcome your fear and conquer the Swiss roll! If things don't go as planned, don't be discouraged. Just keep trying, like I did with macarons. So I hope you do try this recipe out and I hope all goes well.

As always, 
Happy Baking!

Tuesday, August 13, 2013

Strawberry Cupcakes

Crap.

These strawberries are about to go bad.

What do I do? What do I do?

Okay, okay, I'll just puree them and think of what to make later. It'll be fine.

I really didn't think at all while pureeing the strawberries, but it turns out that strawberry puree is great for making fresh strawberry cupcakes. No artificial coloring or strawberry Jell-O needed. In fact, I think these look and taste much better than the strawberry cakes that are made with Jell-O. You can really taste the freshness of the pureed strawberries rather than tasting the artificial sweetness of the Jell-O. 


I searched everywhere for a good recipe. A lot of the ones I found used strawberry Jell-O or needed diced strawberries that would be folded into the batter. However, since I already pureed my strawberries, I kept searching for one that could work with what I already had. Finally, after about an hour or reading through recipes, I found the perfect one...at Confections of a Foodie Bride.

I knew, the second I saw their finished product, that this recipe was going to help me create a fantastic strawberry cake. I could tell just by looking at their pictures. The color and texture of the cake reminded me of a certain strawberry cake my family always bought during special occasions. I'm talking about the cake from Yeh's Bakery in Flushing, NY. It is absolutely the most divine strawberry cake I have ever had. 


Realistically, no cake will ever compare to the cake from Yeh's Bakery. However, for a self-taught baker baking at home, this recipe comes pretty close. I decided to make a swiss meringue buttercream in fear that making a cream cheese frosting would overpower the delicate strawberry flavor and the cake itself. Although a swiss meringue buttercream isn't the easiest to make, it really does complement the cake well. Let's review this recipe, shall we?

Recipe Review:

Taste: You can definitely taste strawberry in this cake. In fact, you can just smell the fresh strawberry while mixing the batter. It isn't too sweet either. Even the buttercream doesn't make it extremely sweet.
Texture: It is extremely moist, with a nice crumb. The cake is very fluffy because of the addition of egg whites only. However, if you seek a denser cake, you can use whole eggs instead.
Level of difficulty: This cake could easily be one of the simplest cakes to make. It's not a one-bowl recipe, but it definitely is not difficult. All you need is a mixer, stand or hand-held will do. The "difficult" part of the recipe would definitely be the making of the buttercream.
Appearance: Beautifully light pink. For those of you who desire a darker shade of pink, you can add a drop or two of pink food coloring. I liked the natural shade of pink though.


Strawberry cupcakes
makes approx 20 standard sized cupcakes

Strawberry Puree  
ingredients: 
24 oz ripe strawberries, hulled, cut in half
1 tablespoon sugar

Strawberry cake
ingredients:
1/2 cup milk, at room temperature
6 eggs whites, at room temperature; or 4 whole eggs, at room temperature
2 tsp vanilla extract
1/2 cup strawberry puree 
2 1/4 cup cake flour
1 3/4 cup sugar 
4 tsp baking powder
1 tsp salt
1 1/2 sticks butter, at room temperatur, cut into cubes 
2 tablespoons strawberry jam
------------------------------------------------------------------------------------------
directions:

For the puree: 
Combine the halved strawberries and the sugar in a bowl. Let sit for 15 minutes to let the juices from the strawberry come out. This is called macerating.

Put the strawberries in a blender and blend until completely smooth. Set aside.


For the cake:
Preheat oven to 350°F and line two cupcake tins with liners. Set aside.
 
In a small bowl, combine the milk, egg whites, vanilla, and strawberry puree and mix lightly with a fork. Set aside. 

In the bowl of your stand mixer, sift the flour, sugar, baking powder, and salt. Mix, with a paddle attachment, until the dry ingredients are just combined.
Continue beating at slow speed and add butter. Mix until combined and resembling moist crumbs.


Add wet ingredients and strawberry jam and beat at medium speed for about 1 minute or until full and evenly combined. Stop mixer to scrape down the sides of the bowl and hand beat for 30 more seconds. At this point, if the color of the batter is not to your liking, add some food coloring. 

Divide the batter evenly among the lined tins. Fill each tin about 2/3 of the way up. These cakes rise a bit. Bake for 20-25 minutes, rotating the pans halfway through the baking process to ensure even baking. Let the cupcakes rest in the pan for 10 minutes before inverting them onto a cooling rack. 


Strawberry Swiss Meringue Buttercrean
ingredients:
4 egg whites
1 1/4 cup sugar
3 sticks of butter, at room temperature, cut into cubes

1/2 cup strawberry puree 
---------------------------------------------------------------------------  
directions:

In a medium bowl, whisk together egg whites and sugar. Place the bowl over a pot of simmering water, constantly whisking, until the mixture reaches 160°F or until all the sugar has dissolved. Transfer the mixture into the bowl of your mixer. 

With the whisk attachment, whisk the mixture on medium-high speed until it reaches stiff peaks and is thick and glossy. Then slowly add in the butter and continue beating until everything is evenly combined. The buttercream should be extremely smooth and silky. Lastly, beat in the strawberry puree until fully mixed in. 

Pipe the buttercream onto the cooled cupcakes however you wish to. I used an Ateco#827 and topped the cupcakes with royal icing flowers.


Make. These. Cupcakes. I promise you, you will not regret it. They have so much strawberry flavor and are so light and delicate. They are beautiful too, especially for a little girl's birthday party or a tea party. 

As always, Happy Baking! 

Monday, August 5, 2013

Summer fruit tart

There's just something so different between the fruits of summer and the fruits of winter. Summer fruits are so much more refreshing and clean, for lack of a better word. The desserts that you make with them reflect the fruits themselves. That's what I love about this tart. All the fruits are raw, crisp, and super fruity.


The fruits that are in season during Summer are just too beautiful: strawberries, blueberries, peaches, blackberries, etc. They are so vibrant and just bursting with flavor. I couldn't think of anything better than to make a refreshing fruit tart, which is actually quite simple to make. It consists of only pâte sucrée, lemon pastry cream, and your choice of seasonal fruits. You can even make the pâte sucrée and pastry cream a few days ahead. They keep well in the refrigerator.

Originally, I was just going to make a plain vanilla pastry cream, but then I realized that adding lemon zest would really enhance the refreshing fruits. I think I made a pretty good decision because the addition of the lemon zest really added a nice burst of citrus and acidity. I would recommend adding the zest rather than the juice of a lemon since the zest carries more flavor than the juice. Also, it wouldn't mess with the consistency of the pastry cream. 


As for the fruits, you can really choose to use any fruits that are in season. I chose strawberries, blackberries, blueberries, and raspberries because I had them all on hand. Any combination of fruits that you enjoy will suffice, though. You really can't go wrong.

Summer Fruit Tart
makes 1, 10-inch tart

Lemon Pastry Cream
adapted from Christine Beanie
ingredients:
2 cups milk
1/4 cup white sugar 
2 egg yolks 
1 egg
1/4 cup cornstarch 
1/3 cup white sugar 
2 tablespoons butter 
1 teaspoon vanilla extract
1 tablespoon lemon zest 
--------------------------------------------------------------------------- 
directions: 
In a heavy saucepan, stir together the milk and 1/4 cup of sugar. Bring to a boil over medium heat.

In a medium bowl, whisk the egg yolks, egg, and 1/3 cup of sugar until thick and pale. This should take about 5 minutes of vigorous whisking. Then stir in the cornstarch. When the milk comes to a boil, drizzle one ladle full of it into the egg mixture. This is called tempering. Once mixed, pour the egg mixture into the the saucepan, and slowly bring to a boil, stirring constantly so the eggs don' t curdle or scorch on the bottom.

When the mixture comes to a boil and thickens, remove from the heat. Stir in the butter and vanilla, mixing until the butter is completely blended in. Pour into a heat-proof container and place a piece of plastic wrap directly on the surface to prevent a skin from forming. Refrigerate until completely chilled, about 4 hours.


Pâte Sucrée
ingredients:
2 cups all-purpose flour
1/3 cup sugar
1/2 tsp kosher salt
1 cup unsalted butter, cold and cubed
1 large egg
1 large egg yolk
--------------------------------------------------------------------------- 
directions: 
On a stand mixer fitted with paddle attachment, combine the flour, sugar, and salt. Mix until just combined. 

Next, with the mixer on low, slowly add the cubed butter. "Beat" the mixture until the butter resembles the size of peas. While the mixer is still running, add the egg and egg yolk. Keep the mixer running until the dough mixture forms a ball. Take the ball of dough out of the mixer and knead until the dough is no longer crumbly, it should take only 5-7 kneads. Wrap the dough in plastic wrap and place in the refrigerator for one hour. 

On a lightly floured surface, roll the dough to about 1/8-inch thick. Make sure that the dough is about 2 inches wider than the diameter of the pan. Gently place the rolled out dough into the tart pan. Trim the edges of the dough by rolling the rolling pin over the edges of the pan or by using a knife. Prick the dough with a fork. Chill the dough for another 45 minutes or place in the freezer for 30 minutes.


Preheat the oven to 350°F. Put the tart on a baking sheet and bake for about 15-20 minutes, or until the edges are golden brown. If you want, rotate the pan halfway into the baking process to ensure even browning. Cool the crust in the pan, completely, before you fill it with the pastry cream. 


Assembly:
Place the cooled tart shell onto a cake stand. Fill the shell with the lemon pastry cream. (I used a piping bag fitted with a round tip). Smooth out the cream and make sure that there are no gaps. Top the tart with your choice of fruits. (I started with layering blueberries, then added raspberries and blackberries on top of any gaps, and then placed a few strawberries randomly to add more color). Finished! 


Like I said, this tart really is quite simple. The only "difficult" part is waiting for all the elements to cool down. It is also so forgiving. If you crack the tart shell just a bit, no worries, because the pastry cream will cover it all up. I hope you try this recipe and enjoy it as much as my family did.

As always, 
Happy Baking! 

Sunday, July 21, 2013

Mini matcha and earl grey madeleines

Madeleines have been on my list of things to bake for quite some time now. For some strange and incomprehensible reason, these dainty little treats have intimidated me. In my mind, the simpler the recipe is, the more difficult it is to make the treat. I guess because it is so simple to make, people become overconfident and can easily mess up. However, madeleines require such few ingredients and really are so simple to make. I don't know why I was so scared.


My brother was coming home for a day after traveling for six months, so I decided it would be nice to treat him to an afternoon tea. This was the perfect excuse for me to finally make madeleines. I also have to admit that I have been sucked into the vortex that is…matcha. Matcha is simply a green tea powder and it adds a wonderful earthy depth to anything you put it in. So for this afternoon tea, I made matcha madeleines [and also earl grey madeleines]. 


Seeing as I only have a mini madeleine pan on hand, I was forced to make mini madeleines. At first I was a bit frustrated with this, but when the madeleines came out of the oven, they were just the cutest little cakes ever. They don't have the brightest green color. In fact, I like the earthy, slightly pale green color they have. If you wanted to make them more vibrant, I suppose you could add some green food coloring. 


One more thing that I didn't do and what I would recommend for you to do is to add some milk or lemon juice to the batter; maybe about 1 tablespoon because the cakes were just a tad on the dry side. Other than that, they were delicious. The matcha flavor came through just enough to not be overpowering. The earl grey was also so floral. I think I prefer the earl grey to the matcha, but they were both delicious. If you are ever in the mood for afternoon tea or want to make use of your matcha, I highly recommend making these madeleienes. 


Matcha [and Earl Grey] Madeleines
makes approx 50 mini madeleines

Base batter
ingredient:
2/3 cup all purpose flour
3/4 teaspoon baking powder
Pinch of salt
1/2 cup sugar
2 large eggs, at room temperature
6 tablespoons unsalted butter, melted and cooled

1 teaspoon vanilla extract
--------------------------------------------------------------------------- 
 
directions:

In a medium bowl, sift together the flour, baking powder, and salt. Stir to combine.

On a stand mixer, or with a hand mixer, combine the sugar and eggs. Beat the mixture for 5-6 minutes, or until thick and pale. Once pale, add the vanilla. (At this point you would want to add about 1 tablespoon of milk or lemon juice.

Gently fold in the flour mixture into the egg mixture. Then add the melted and cooled butter. Mix until all the ingredients are incorporated thoroughly. 

Now, divide the batter in half into two medium bowls. In one bowl, add 1 1/2 teaspoons of matcha. In the other, add 2 teaspoons of finely ground earl grey tea leaves. Cover the bowls with plastic wrap and refrigerate for 3 hours. This step allows the madeleines the form their signature humps. 

After the batter has been refrigerated for long enough, preheat the oven to 400°F. Spoon the mixture into greased pans. Fill them about 3/4 of the way up, approximately 1- 1 1/2 teaspoons. Flatten the tops just slightly. If you overfill the pans, the batter will spill over and the madeleines will bake into each other. Bake the cakes for 8-10 minutes, or until the edges are just golden brown. Cool completely. Once they are completely cooled, just tap the pans onto a sheet tray and the madeleines should pop out easily. 


These little cakes are so delicious when dipped into a nice cup of hot tea. Any tea is fine. Choose your favorite. The earl grey madeleines are so wonderfully floral and the matcha madeleines are extremely rich and earthy. I really do hope you enjoy them!


As always, Happy baking!!