Showing posts with label chocolate. Show all posts

Sunday, July 20, 2014

Chocolate Ganache Cake

Do you ever have an intense craving?

You know, one of those cravings that don’t go away no matter how hard you try to resist.

I did.

This morning.

I had the deepest, most intense desire for a rich chocolate cake. At first I thought that I could just ignore it like I usually do. The next thing I knew, I was on Google searching for pictures of chocolate cake. I was torturing myself. I quickly closed my browser and tried to erase the images from my mind. In the blink of an eye, I was at the kitchen counter measuring flour and cocoa powder. I caved.


Truthfully, I have no regrets whatsoever for caving. The result of my cravings was quite possibly the most sinfully delicious cake I’ve ever made. The best part is that it was also the simplest cake I’ve ever made. It only consists of two things: chocolate cake and chocolate ganache.

I’m not a chocolate addict. Usually a fun size snickers bar is all it takes for me to not need chocolate for months. But there’s just something about this cake that is irresistible. Maybe it's the ridiculously moist chocolate cake. Maybe it’s the velvety smooth chocolate ganache. Whatever it is, I know that I don’t want it to ever leave. I want this chocolate cake in my life forever…till death do us part.


Recipe Review:

Taste: There is a deep chocolate flavor from the extra brute cocoa powder I use for the cake and the E. Guittard chocolate disks I use for the ganache.
Texture: So rich and moist. The cake has a nice crumb and the ganache is so smooth.
Appearance: I wanted the cake to look a bit more rustic so I left the exterior looking extra “homemade”. The inside has four lovely layers of cake and thin layers of chocolate ganache in between. It is sheer perfection.
Level of Difficulty: This cake is very simple to make. The ganache takes a few hours to cool, but assembly is a cinch. 


Chocolate Ganache

ingredients:
12 ounces (1 1/2 cups) heavy cream
24 ounces (3 cups) semi sweet chocolate (I used E. Guittard, 61% cacao) 
------------------------------------------------------------------------------------------
directions:

In a medium saucepan, heat the heavy cream until just simmering. Put the chocolate in a large bowl and pour in the heavy cream. Stir the mixture until the chocolate is evenly combined and there are no lumps. Cover the bowl with plastic wrap making sure that the surface of the mixture is covered and put in the refrigerator until it has cooled to a spreadable consistency. 


Chocolate Cake
yields 2, 8-inch cakes 

ingredients:
2 1/4 cup all-purpose flour 
2 cups sugar 
3/4 cup cocoa powder 
2 1/2 teaspoons baking soda
2 teaspoons baking powder 
1/2 teaspoon salt 
1 1/4 cups buttermilk, room temperature 
3/4 cup brewed coffee, lukewarm
2/3 cup vegetable oil 
3 eggs, room temperature 
1 teaspoon vanilla extract 
------------------------------------------------------------------------------------------
directions:


Preheat the oven to 350°F. Prepare 2, 8-inch baking pans with cooking spray and parchment paper. Set aside.

In a medium sized bowl sift the flour, sugar, cocoa powder, baking soda, baking powder and salt. Whisk to combine.

In a separate bowl, mix together the buttermilk, coffee, oil, eggs and vanilla. Combine the wet ingredients into the dry ingredients and mix until just combined. 

Once mixed, divide the batter evenly among the prepared baking pans. Bake for 20-25 minutes or until a toothpick comes out clean. Don't forget to rotate the pans halfway through the baking process to ensure an evenly baked cake. Cool completely. 


Assembly:

Once the cake layers have cooled completely, invert them onto a cutting board and peel off the parchment. Slice of the domed tops and then divide each layer in half, leaving you with 4 thin layers. 

Place the first layer of cake on a cake board and spread a thin layer of ganache on top. Repeat with the next two layers. Once you've done that, place the last cake layer on top and spread the rest of the ganache all over the cake. VoilĂ !


I highly recommend you make this if you’re a chocolate addict. You will never get tired of it. If you aren’t a chocolate addict, this cake will definitely make you one. Just be sure to never share. Just this once, be gluttonous.

As always,

Happy Baking!

Tuesday, June 12, 2012

Ultimate Chocolate Chip Cookies

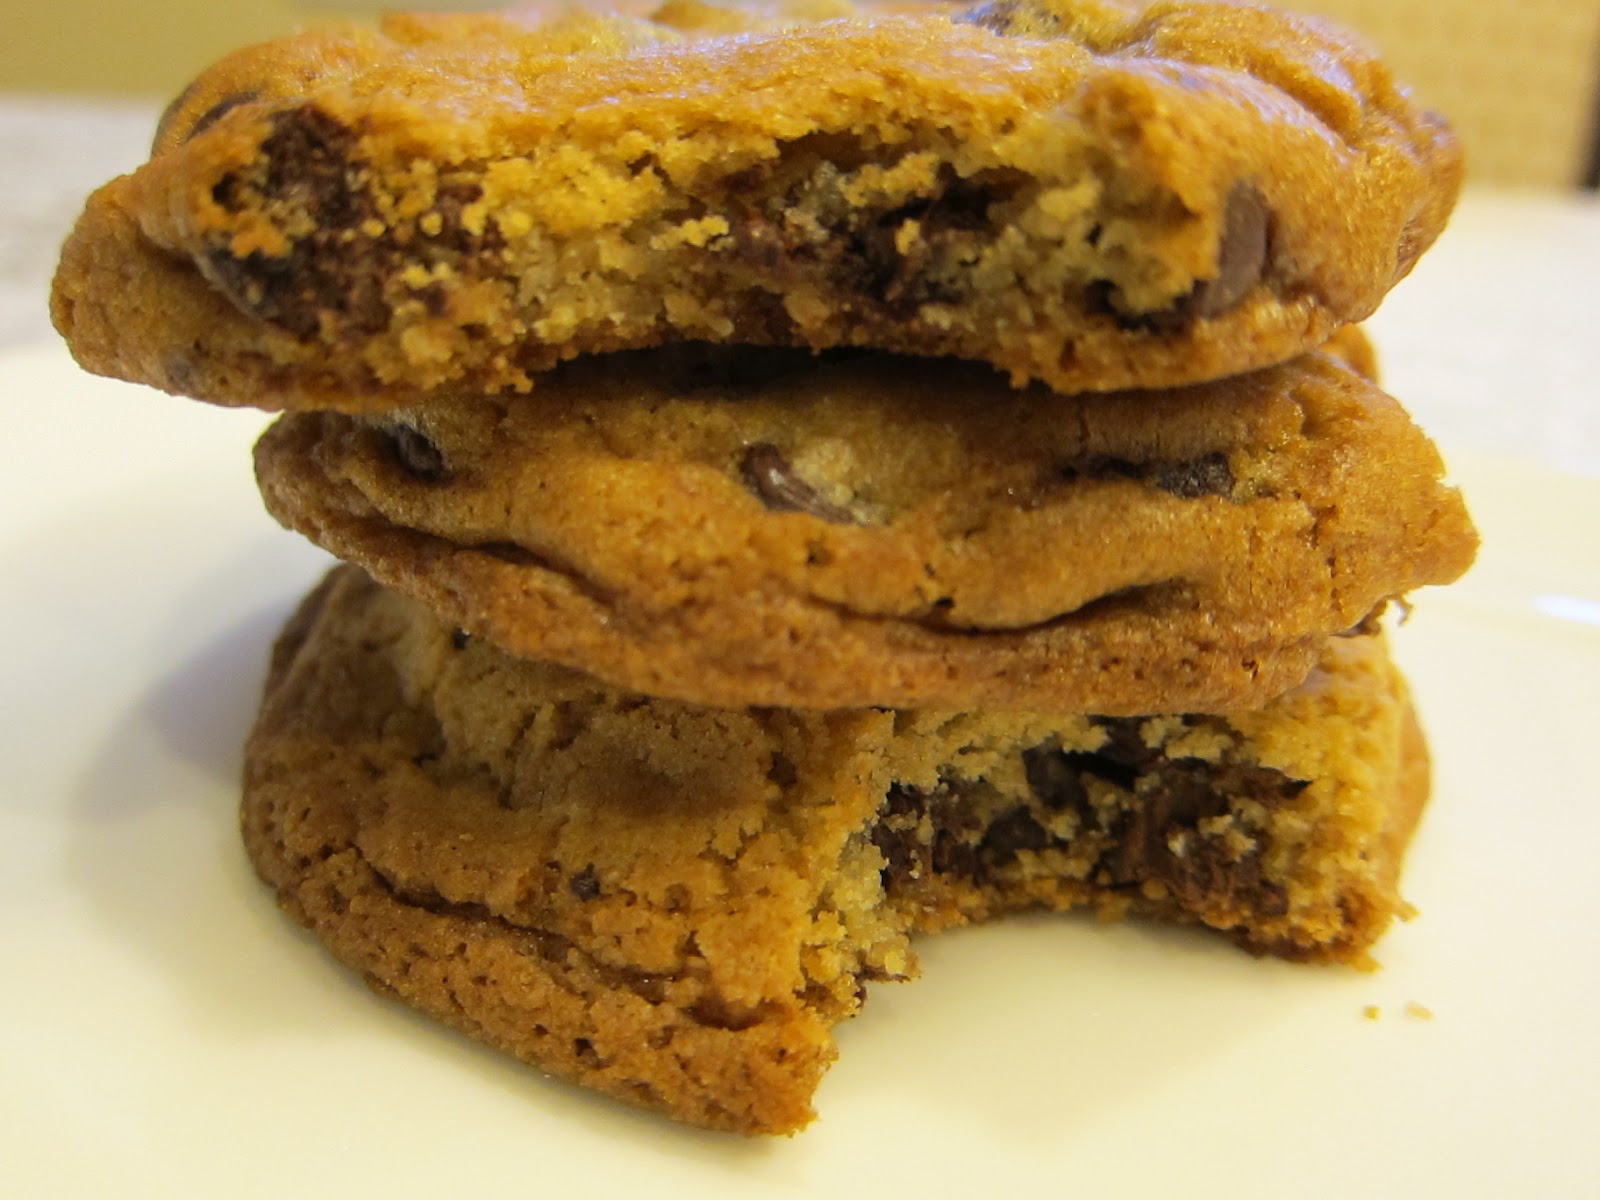
For the longest time, I've been searching for the ultimate chocolate chip cookie recipe. I've tried countless recipes, each better than the last. For a while now I've declared Deb's recipe from Smitten Kitchen the best chocolate chip cookie ever. Well I'm sad and happy to say that I've found a new recipe that is by far the greatest chocolate chip cookie I've ever had and made. Where did I find this recipe, you may ask? I found it from the most boring place you could look for.....the New York Times. Me being your average teenager, I find the newspaper to be extremely boring, especially the NYT. Never would I have expected to find such a fantastic recipe from a newspaper.

What makes these cookies so special is that they require both cake flour and bread flour. They're two ingredients that most people don't have in their pantry. Luckily I did have KAF bread flour hiding in my pantry. As for the cake flour, it was nowhere to be found. However, you can easily substitute cake flour with AP flour and cornstarch*. I bet you could just use AP flour but I don't think the cookies would have the same texture or shape. They just wouldn't be as delicious.

I decided to put on a little experiment. I wanted to see how the cookies were different after different intervals of chilling the dough. According to the recipe, this dough can be chilled for up to 72 hours. I baked off my cookies after 1 hour, 24 hours, and 48 hours.


I baked this cookie after chilling the dough for only 1 hour. It tasted delicious, but wasn't amazing. It was just missing something.


I baked this cookie after 24 hours. The texture was chewier than the 1 hour-chilled cookie. There was also a much richer flavor, but it still seemed like it was missing something.


This cookie was the winner. It had a wonderful crisp exterior and delectable chewy interior. It had the best color and the texture was out of this world. Chilling for 48 hours is definitely the secret to this recipe. 


You can just see the difference in the three cookies. The 48 hour-chilled cookie is much darker and the edges are more defined. It was just so much more delicious. I weighed out all these cookies and baked them for the same amount of time. They were all 5.2 ounces. I made all the other cookies 3 ounces. I even packaged some of them for my teachers for the last day of school. 


Here's the recipe!

New York Times Chocolate Chip Cookies
makes 18 very large cookies or 31 smaller cookies

ingredients:
2 cups minus 2 tablespoons (8 1/2 ounces) cake flour
1 2/3 cups (8 1/2 ounces) bread flour
1 1/4 teaspoons baking soda
1 1/2 teaspoons baking powder
1 1/2 teaspoons coarse salt (I used sea salt)
1 1/4 cups unsalted butter (2 1/2 sticks)
1 1/4 cups (10 ounces) packed light brown sugar
1 cup plus 2 tablespoons (8 ounces) granulated white sugar
2 large eggs
2 teaspoons vanilla extract
20 ounces bittersweet chocolate chips (I used semi-sweet)
extra chocolate chips, optional
sea salt (optional)

-------------------------------------------------------------------
directions:

Sift together the dry ingredients (flour through salt). I just scraped mine through a fine strainer/sieve since my sifter isn't all that great. Set aside.

Use an electric mixer to combine the butter and sugars- mixing until the mixture is very light, about 5 minutes. Mix in the eggs, one at a time. Add the vanilla. Reduce the speed to low, add the dry ingredients and, mix just until the dry ingredients are incorporated. Stir in the chocolate chips. Place the dough in an airtight container and refrigerate a minimum of 24 to 36 hours before baking (and up to 72 hours).

Preheat oven to 350 degrees F. Line baking sheets with parchment paper or silpat mats. For 5-inch cookies, scoop six 3.25 ounce mounds of dough- giant golf ball-sized (I rolled mine into balls) onto a baking sheet, spacing them evenly apart. Don't try to fit more on the sheet or you'll end up with cookies baking into each other. Dot some extra chocolate chips on top, if desired. Sprinkle each ball of dough with a small pinch of sea salt, if desired.

Bake until the edges are golden brown and the center is lighter and soft, 18 to 20 minutes. Let the cookies cool on the baking sheet for about 15 minutes, then transfer the cookies to a rack and let them cool completely. Repeat with the remaining cookie dough.


I really do hope you try making these cookies. The recipe itself is extremely simple. The only "tough part" about this recipe is the waiting period. As I always say, the wait is well worth it. These cookies are fantastic! I highly recommend you try making these cookies. You won't regret it.

Happy Baking!


*For every 1 cup of AP flour, take out 2 tablespoons and replace those 2 tablespoons with 2 tablespoons of cornstarch.

Saturday, April 7, 2012

Cinnamon Hazelnut Biscotti

It's been a while, hasn't it? I've been so busy with school and college apps....but I'm back!!! Even though I haven't been blogging recently, I still have been baking and cooking every chance I got. Recently I've been experimenting new recipes and I came across a recipe for cinnamon hazelnut biscotti.

I don't know why, but I've always been afraid of making biscotti. They just seemed like they would crumble and I would over bake them. So going into this, I had no idea what the outcome would be. But when they came out absolutely perfectly, I knew that there was no reason to be afraid of making biscotti anymore.


What I like about this recipe is that it's beyond simple. There a just a few ingredients but they pack a lot of flavor. The cinnamon really adds a nice aroma to the cookie and the scent that fills the air is heavenly. Trust me on this, you won't regret making this cookie. This will definitely be a recipe that you will use over and over.

On with the recipe!

Cinnamon Hazelnut Biscotti

makes 30 cookies
ingredients:
3/4 cup butter
1 cup white sugar
2 eggs
1 1/2 teaspoons vanilla extract
2 1/2 cups all-purpose flour
1 teaspoon ground cinnamon
3/4 teaspoon baking powder
1/2 teaspoon salt
1 cup hazelnuts, skinned
1 cup semi sweet chocolate chips (optional)
---------------------------------------------------------------------------------------------
directions:

Preheat oven to 350 degrees F(175 degrees C). Grease a cookie sheet or line with parchment paper.  

In a medium bowl, cream together butter and sugar until light and fluffy. Beat in eggs and vanilla. While the eggs are beating, in a separate bowl, sift together the flour, cinnamon, baking powder, and salt. Once the eggs have incorporated into the butter/sugar mixture, mix the dry ingredients into the egg mixture. Don't over beat. Stir in the hazelnuts. 

When all the ingredients are fully incorporated, shape the dough into two equal logs approximately 12 inches long. Place logs on baking sheet, and flatten out to about 1/2 inch thickness.  

Bake for about 30 minutes in preheated oven, or until edges are golden and the center is firm. Remove from oven to cool on the pans. When loaves are cool enough to handle, use a serrated knife to slice the loaves diagonally into 1/2 inch thick slices. Return the slices to the baking sheet. 

Bake for an additional 10 minutes, turning over once. Cool completely.

While the cookies are cooling, melt the chocolate chips over a double boiler or in the microwave. Once the chocolate is melted, spoon it over the cookies using a swinging motion.


I was so pleasantly surprised when they came out looking absolutely beautiful. My parents told me they found these to be the best biscottis they had ever eaten. They weren't overly sweet and the chocolate drizzle added just the perfect touch. I really do hope you try this recipe out. It's worth the time and effort.

Happy Baking! 

Friday, April 8, 2011

Milk and Cookies

Never is there a time when a good old fashioned chocolate chip cookie doesn't make you feel happier. There's just something about this comfort food that brightens the moment. I think it's the brown sugar which adds the rich, chewy texture we all look for. In my opinion, a good chocolate cookie consists of crisp outer edges, and a wonderfully chewy center. This cookie, is all that and more.


This is probably the easiest cookie recipe on the face of the earth and it yields wonderful cookies. Here's the recipe:

Chocolate Chip Cookies:

makes 36 cookies
ingredients:

  • 1 cup and 2 tablespoons all-purpose flour
  • 1/2 teaspoon baking soda
  • 1/2 teaspoon salt
  • 1/2 cup butter, softened
  • 6 tablespoons granulated sugar
  • 6 tablespoons packed brown sugar
  • 1/2 teaspoon vanilla extract
  • 1 large egg
  • 1 cup semi-sweet chocolate chips (i used mini chocolate chips)
_____________________________________________________________
directions:
Preheat the oven to 375 degrees F. Sift the flour, baking soda and salt in small bowl. Using a mixer, beat the butter, granulated sugar, brown sugar and vanilla extract until creamy. Then add the egg and beat well. Gradually beat in flour mixture. Stir in chocolate chips. Drop by rounded teaspoons onto greased baking sheets. (i used a small ice-cream scoop) Bake the cookies for 8 to 10 minutes or until golden brown. Once golden brown, cool for 5-10 minutes. 

The hardest part about making these cookies is most likely waiting for them to bake. The entire house become filled with a wonderfully sweet aroma that you just cannot resist. Try not to stare at them baking because you know what they say, "a watched pot never boils." But, once your cookies have been baked and cooled, I think you know what to do next.... DEVOUR THEM! Don't save them, EAT THEM! Pour yourself a nice cold glass of milk, and enjoy the fruits of your labor.

Happy Baking! 

Sunday, April 3, 2011

Hazelnut "Entremet"

For the past week I've been pretty much obsessed with Entremets. Entremet literally translates into "between servings" (from old French). They're either small dishes served between courses or dessert. I was first introduced to these small delights when I came across this food blog: http://bossacafez.blogspot.com Evan's Kitchen Ramblings is now my favorite blog to follow. Her desserts are absolutely gorgeous. Now, I would hardly ever attempt to create her desserts, therefore last night I created my own, simpler version of an Entremet; my hazelnut/Nutella entremet. I served it to my parents and they absolutely loved it. So here's the recipe:

makes approx 8-10 servings
ingredients:

for the chocolate cake (Hershey's Perfectly Perfect Chocolate Cake): 
2 cups sugar 
1-3/4 cups all-purpose flour
3/4 cup HERSHEY'S Cocoa
1-1/2 teaspoons baking powder
1-1/2 teaspoons baking soda
1 teaspoon salt
2 eggs
1 cup milk
1/2 cup vegetable oil 
2 teaspoons vanilla extract
1 cup boiling water
_____________________________________________________________
for the hazelnut crunch:
1/4 cup hazelnut spread (I used Nutella)
2 tbsp shortening (Don't use butter)
1-1 1/4 cup crisped rice (I used Rice Krispies) 
_____________________________________________________________
for the hazelnut mousse:
2 tbsp butter, softened
1 1/2 tbsp cream cheese; softened
1/2 cup Nutella, softened(You can use more if you prefer a more prominent hazelnut flavor or less if you don't)
1/3 cup heavy cream
_____________________________________________________________
directions:

1. chocolate cake:
Heat oven to 350°F. Grease and flour the baking sheet tray. Stir together sugar, flour, cocoa, baking powder, baking soda and salt in large bowl. Add eggs, milk, oil and vanilla; beat on medium speed of mixer 2 minutes. Stir in boiling water (batter will be thin). Pour batter into prepared pan. Bake 30 to 35 minutes or until wooden pick inserted in center comes out clean. Cool 10 minutes; remove from pan to wire racks. Cool completely.
* I used most of the batter to make 12 cupcakes. I poured the remaining batter into a baking sheet. Once it was baked and cooled I cut the sheet cake in half vertically. Then I trimmed the cakes into approx 8"x6" pieces.  However you can make them as big or small as you want.* 
_____________________________________________________________
2. hazelnut crunch:
In the microwave, melt the hazelnut spread and butter. (the butter will be melted, the hazelnut spread will be softened). Once the butter has melted, stir in the crisped rice. The mixture should be slightly wet/damp. Set this aside. 
_____________________________________________________________
3. hazelnut mousse:
Cream the softened butter and cream cheese until pale and fluffy. Then add the hazelnut spread into the mixture and cream. In a separate bowl, whip the heavy cream until it reaches slightly stiff peaks. Fold in 1/4 of the whipped cream into the hazelnut mixture to lighten it. Then slowly fold in the rest of the whipped cream into the hazelnut mixture. The mousse should be nice and fluffy. 
_____________________________________________________________
4. assembly:
Line a rectangular mousse ring with parchment paper. In the ring layer one of the halves of chocolate cake on the bottom. Next, spread a generous layer of the hazelnut crunch onto the cake. Refrigerate until set. (approx 10 minutes) Then layer the other half of the cake on top of the crunch. Next, spread the mousse on top the cake. Make sure the mousse is layered nice and smoothly. Refrigerate until set. (approx 30 minutes) Once set, dust the cake with cocoa powder. Remove the cake from the ring and cut the cake into approx 8 3"x2" slices. Garnish and serve. Enjoy! 

Happy Baking!