Showing posts with label cookies. Show all posts

Tuesday, June 12, 2012

Ultimate Chocolate Chip Cookies

For the longest time, I've been searching for the ultimate chocolate chip cookie recipe. I've tried countless recipes, each better than the last. For a while now I've declared Deb's recipe from Smitten Kitchen the best chocolate chip cookie ever. Well I'm sad and happy to say that I've found a new recipe that is by far the greatest chocolate chip cookie I've ever had and made. Where did I find this recipe, you may ask? I found it from the most boring place you could look for.....the New York Times. Me being your average teenager, I find the newspaper to be extremely boring, especially the NYT. Never would I have expected to find such a fantastic recipe from a newspaper.
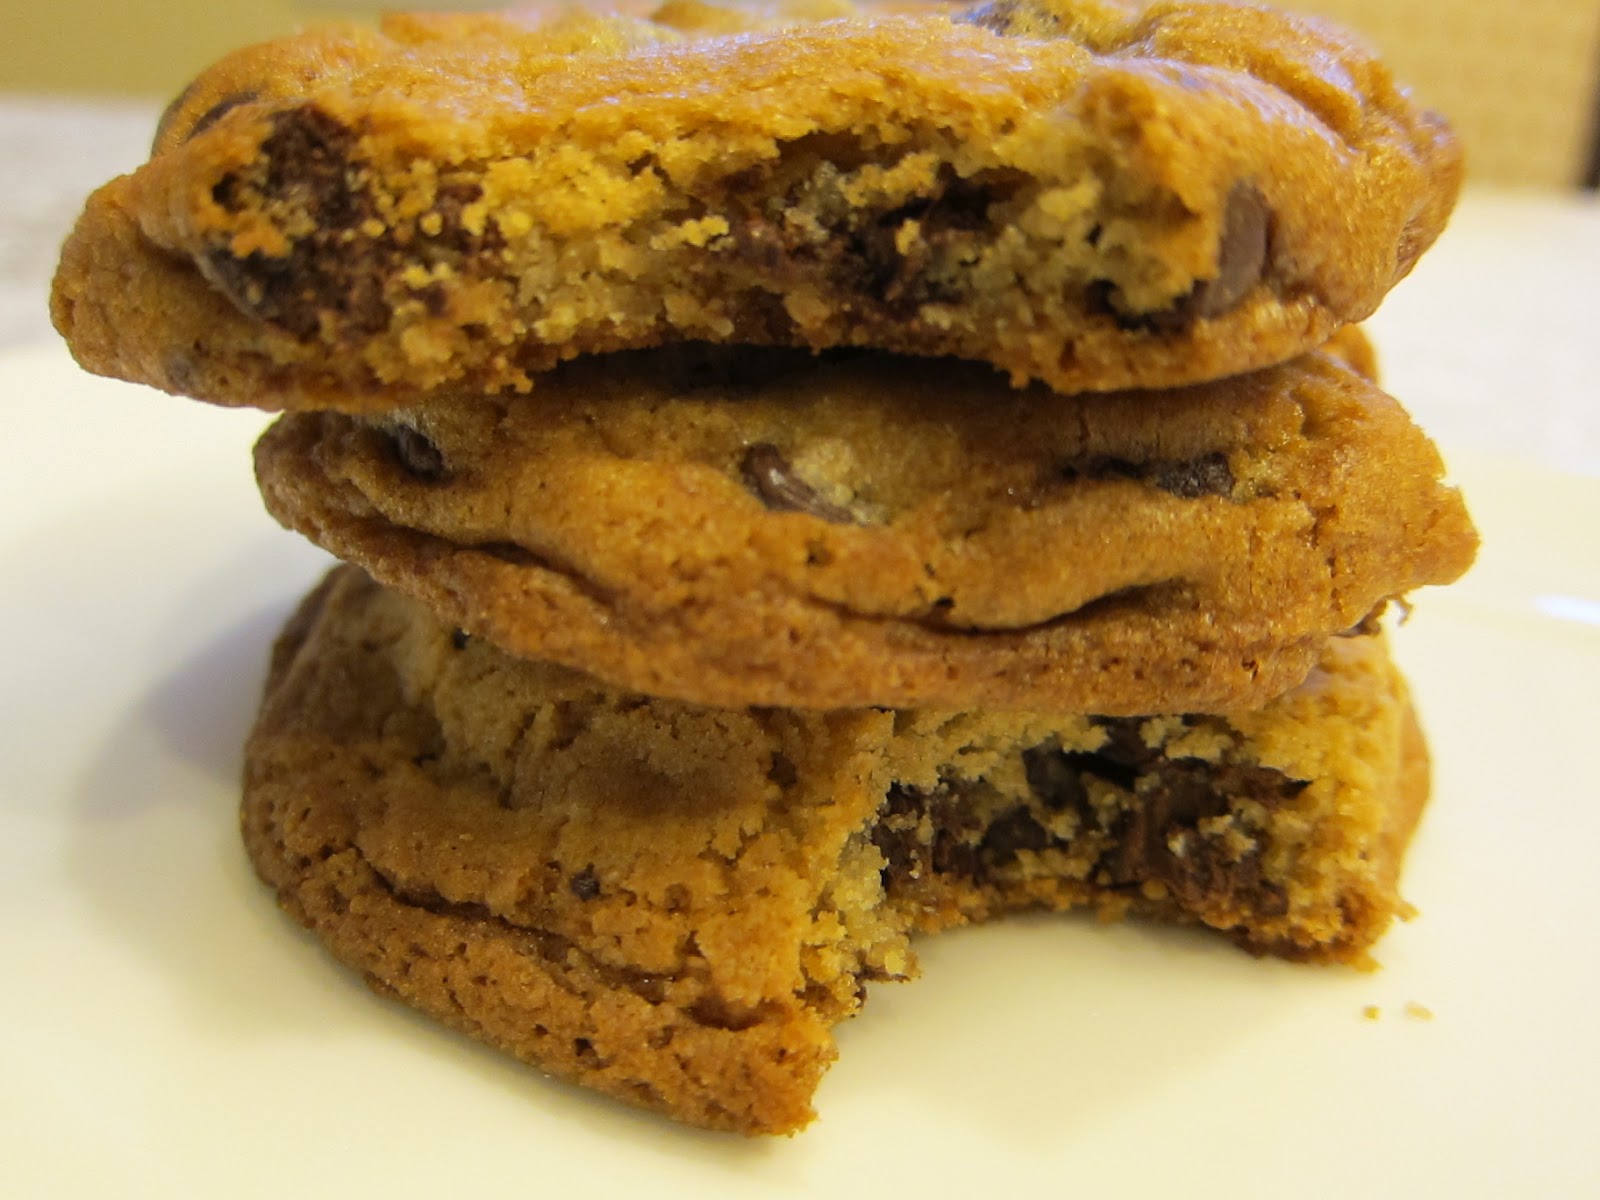
What makes these cookies so special is that they require both cake flour and bread flour. They're two ingredients that most people don't have in their pantry. Luckily I did have KAF bread flour hiding in my pantry. As for the cake flour, it was nowhere to be found. However, you can easily substitute cake flour with AP flour and cornstarch*. I bet you could just use AP flour but I don't think the cookies would have the same texture or shape. They just wouldn't be as delicious.

I decided to put on a little experiment. I wanted to see how the cookies were different after different intervals of chilling the dough. According to the recipe, this dough can be chilled for up to 72 hours. I baked off my cookies after 1 hour, 24 hours, and 48 hours.


I baked this cookie after chilling the dough for only 1 hour. It tasted delicious, but wasn't amazing. It was just missing something.


I baked this cookie after 24 hours. The texture was chewier than the 1 hour-chilled cookie. There was also a much richer flavor, but it still seemed like it was missing something.


This cookie was the winner. It had a wonderful crisp exterior and delectable chewy interior. It had the best color and the texture was out of this world. Chilling for 48 hours is definitely the secret to this recipe. 


You can just see the difference in the three cookies. The 48 hour-chilled cookie is much darker and the edges are more defined. It was just so much more delicious. I weighed out all these cookies and baked them for the same amount of time. They were all 5.2 ounces. I made all the other cookies 3 ounces. I even packaged some of them for my teachers for the last day of school. 


Here's the recipe!

New York Times Chocolate Chip Cookies
makes 18 very large cookies or 31 smaller cookies

ingredients:
2 cups minus 2 tablespoons (8 1/2 ounces) cake flour
1 2/3 cups (8 1/2 ounces) bread flour
1 1/4 teaspoons baking soda
1 1/2 teaspoons baking powder
1 1/2 teaspoons coarse salt (I used sea salt)
1 1/4 cups unsalted butter (2 1/2 sticks)
1 1/4 cups (10 ounces) packed light brown sugar
1 cup plus 2 tablespoons (8 ounces) granulated white sugar
2 large eggs
2 teaspoons vanilla extract
20 ounces bittersweet chocolate chips (I used semi-sweet)
extra chocolate chips, optional
sea salt (optional)

-------------------------------------------------------------------
directions:

Sift together the dry ingredients (flour through salt). I just scraped mine through a fine strainer/sieve since my sifter isn't all that great. Set aside.

Use an electric mixer to combine the butter and sugars- mixing until the mixture is very light, about 5 minutes. Mix in the eggs, one at a time. Add the vanilla. Reduce the speed to low, add the dry ingredients and, mix just until the dry ingredients are incorporated. Stir in the chocolate chips. Place the dough in an airtight container and refrigerate a minimum of 24 to 36 hours before baking (and up to 72 hours).

Preheat oven to 350 degrees F. Line baking sheets with parchment paper or silpat mats. For 5-inch cookies, scoop six 3.25 ounce mounds of dough- giant golf ball-sized (I rolled mine into balls) onto a baking sheet, spacing them evenly apart. Don't try to fit more on the sheet or you'll end up with cookies baking into each other. Dot some extra chocolate chips on top, if desired. Sprinkle each ball of dough with a small pinch of sea salt, if desired.

Bake until the edges are golden brown and the center is lighter and soft, 18 to 20 minutes. Let the cookies cool on the baking sheet for about 15 minutes, then transfer the cookies to a rack and let them cool completely. Repeat with the remaining cookie dough.


I really do hope you try making these cookies. The recipe itself is extremely simple. The only "tough part" about this recipe is the waiting period. As I always say, the wait is well worth it. These cookies are fantastic! I highly recommend you try making these cookies. You won't regret it.

Happy Baking!


*For every 1 cup of AP flour, take out 2 tablespoons and replace those 2 tablespoons with 2 tablespoons of cornstarch.

Tuesday, May 15, 2012

Frosted Sugar Cookies

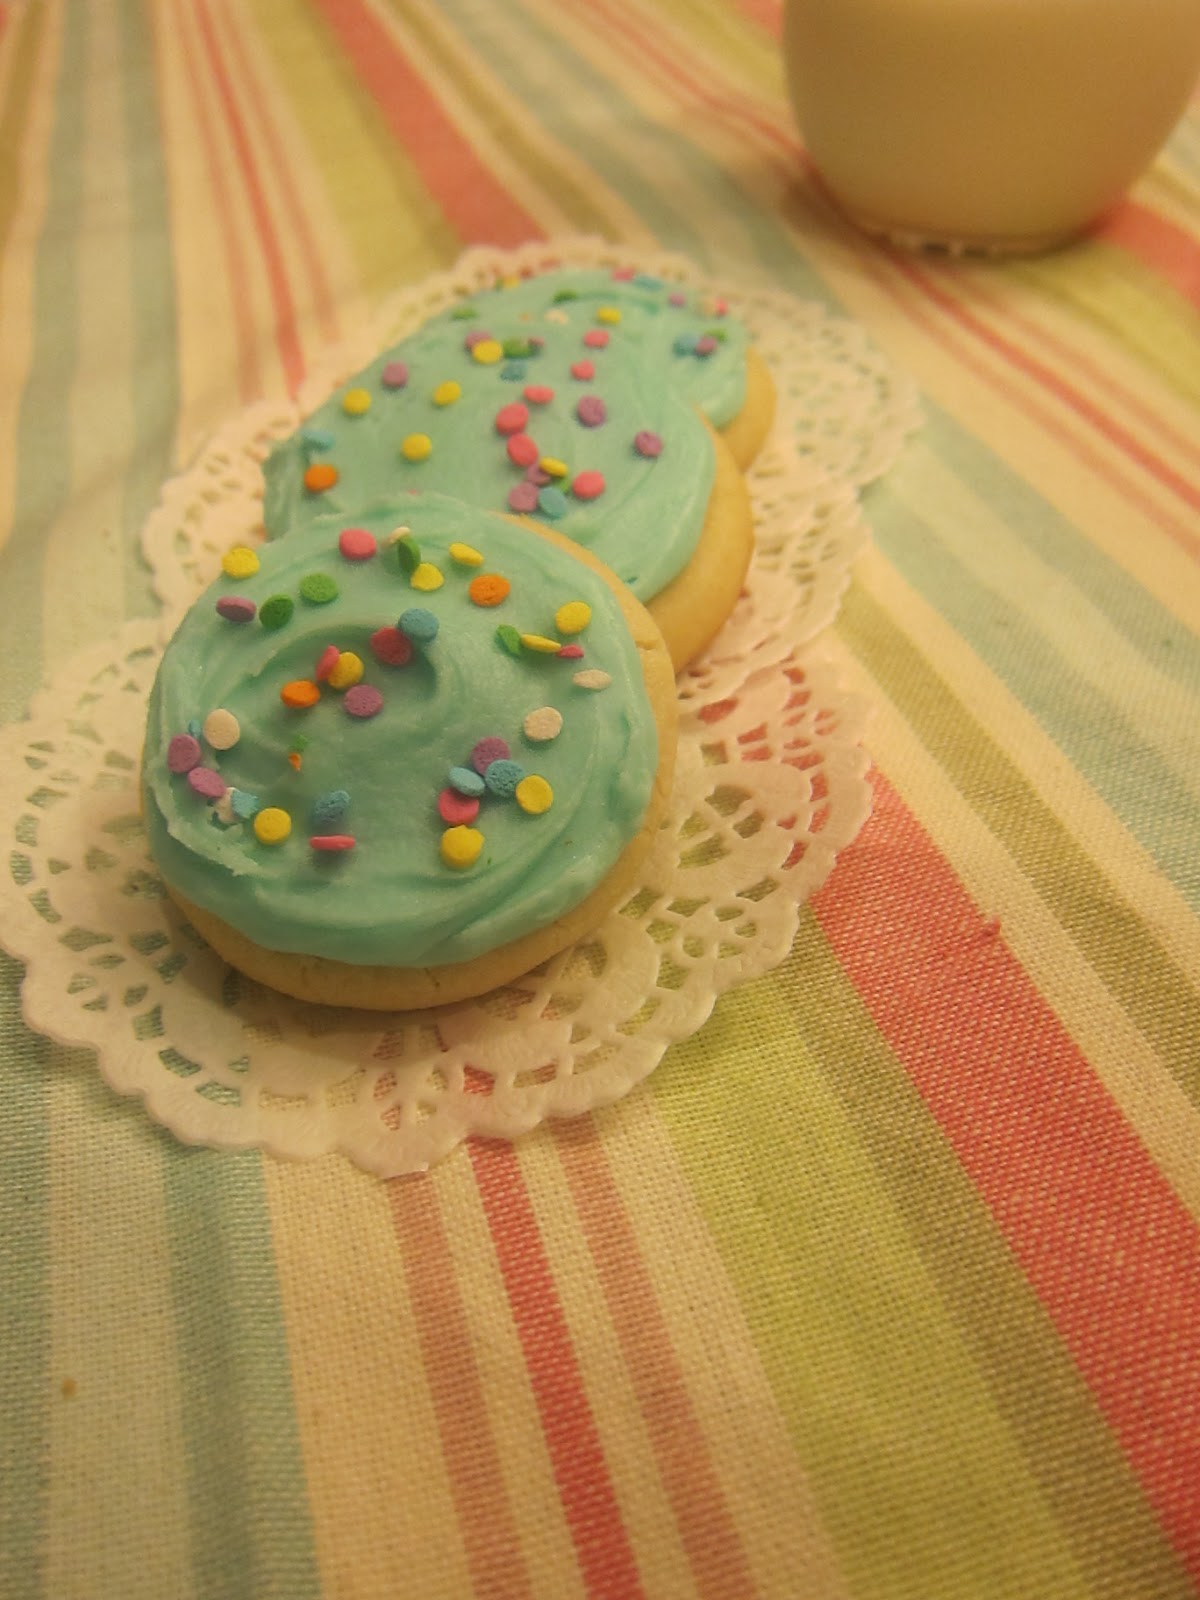
Every time I walk into my local Waldbaum's I see these wonderful looking cookies. They're soft and chewy sugar cookies frosted with bright and vibrant frosting. They look so adorable and festive, especially when topped with sprinkles. Each time I want to buy a pack and devour them all...but my conscience tells me not to, so I listen to it.


But one day, when I was home with nothing to do, I had the greatest desire to make these festive treats. So I did. And they were delicious. They're chewy, soft, and not overly sweet. The frosting adds just the right amount of flavor. Let's face it...frosting makes everything better. Just like bacon.

I wish I could say that this is my own original recipe, but sadly it is not. I borrowed this recipe from the lovely Annie of Annie's Eats. I love her blog and her recipes are easy and delicious. She's also an excellent photographer. The pictures she takes make her food look just that much more delectable.

Well, I guess it's time for the recipe. It's extremely simple, but it requires that you chill the cookies for 1 hour. I know, I know. A whole extra hour of waiting is needed in order to dig into these cookies. You must resist temptation, however, because the chill-time is what gives these cookies such great texture.


Frosted Sugar Cookies
makes about 2 dozen cookies

Cookie
ingredients: 
4½ cups all-purpose flour
4½ tsp. baking powder
¾ tsp. salt
1½ cups (3 sticks) unsalted butter, at room temperature
1½ cups sugar
3 large eggs
5 tsp. vanilla extract
--------------------------------------------------------------------------
directions:

for the cookies: preheat the oven to 350˚ F.  Line baking sheets with parchment paper or silicone baking mats.  In a medium bowl combine the flour, baking powder and salt, and whisk together to blend.  In the bowl of an electric mixer, combine the butter and sugar and beat together on medium-high speed until soft and fluffy, about 2-3 minutes.  Beat in the eggs one at a time, mixing well after each addition and scraping down the bowl as needed.  Blend in the vanilla.  With the mixer on low speed, add in the dry ingredients mixing just until incorporated and evenly mixed.  Cover and chill the dough for 1 hour.

When you are ready to bake the cookies, scoop a scant quarter cup of dough and roll into a ball.  Flatten the ball slightly and place on the prepared baking sheet. Repeat with the remaining dough, spacing the cookies at least 2-3 inches apart. Bake about 10-12 minutes or just until set.  (Do not overbake!  The edges should be no more than very lightly browned if at all.)  Let cool on the baking sheet for several minutes.  Transfer to a wire rack to cool completely.

Frosting
ingredients: 
5 cups confectioners’ sugar, sifted
1/3 cup (5 1/3 tbsp.) unsalted butter, melted
1 tbsp. vanilla extract
7-8 tbsp. milk (plus more, as needed)
Food coloring (optional)
Sprinkles (optional)
--------------------------------------------------------------------------
directions:
To frost the cookies, place the confectioners’ sugar in a medium bowl.  Add the melted butter, vanilla, and milk to the bowl and whisk until smooth.  Whisk in additional milk as necessary, 1 teaspoon at a time, until you reach your desired consistency.  Tint with food coloring if desired.  Use an offset spatula or spoon to frost the cooled cookies.  (If the frosting begins to thicken as you decorate, just continue to whisk in small amounts of milk to keep it workable.)  Top with sprinkles if desired.  Store in an airtight container.


If you do choose to make these cookies, which I highly recommend you do, don't share them with your friends. You'll never be able to taste one. They'll sell out instantly. Trust me, I made that mistake. They're absolutely delicious and buttery. You won't be able to make them just once.

Happy Baking!

Friday, May 4, 2012

French Macarons

They should change the phrase to, "fourth time's the charm." That's how many times it took me to finally be able to make a decent looking macaron. For years I've been fascinated with these little french treats, but I've been too afraid to make them myself. But recently, I've been obsessed and I had to give them a try.

The perfect macaron consists of three key aspects: 
1. They must have feet! It's the key to a beautiful looking macaron. It's what makes you do a double take when you pass by a french patisserie.
2. The exterior must be crunchy and glossy! You know you have a beautiful macaron when the exterior shell has a good crunch when you bite into it. Also, they must have a nice shine to it. Food is half aesthetics....isn't it?
3. The interior should have a soft, meringue texture! A perfect macaron always has a smooth and chewy interior. It should be soft but still have a nice bite to it.


My first attempt was a total flop. The macarons were mishapen, deflated, and lacked the proper "feet." The had a nice chew inside, but the shells were cracked and they looked like they had just been through an earthquake. The next two attempts were no more successful than the first. Both times I became so frustrated that I threw the batter into the sink in rage. After the third attempt, I swore to myself that I would never make macarons again. Then came Thursday, May 3, 2012.

I spent most of the night studying macarons. I watched all the videos and learned all the proper techniques: don't over whip your egg whites, make sure to use room temperature egg whites, weigh your ingredients, add a pinch of cream of tartar into your egg whites to help stabilize them, let your piped shells rest for 1 hour to create a proper coating. After having watched all those tutorials, my will power had diminished. I had to try one more time. I knew that I would succeed this time...I simply had to.

The final result? Why don't you see for yourself?


I finally made beautiful macarons with feet, a crispy exterior, and a chewy interior. They had great flavor and were the perfect late-night snack. I was so happy that I literally took a victory lap around my kitchen.

If you're a brave soul and you want to try to make your own macarons, here's the recipe. I used Dulce Delight's recipe:


Hazelnut macarons with Nutella buttercream
adapted from Dulce Delight

Shell
ingredients:
55g raw almonds
55g raw hazelnuts
200g confectioners sugar
2 tbsp cocoa powder
90g egg whites- aged for 2 days in your refrigerator 
pinch of cream of tartar
40g granulated sugar
--------------------------------------------------------------------------
directions:

Grind the almonds, hazelnuts, confectioners sugar, and cocoa powder in a food processor. Pulse until everything is finely ground and well mixed.

Using a stand mixer, whip the aged egg whites until frothy. Once they become frothy, add a pinch of cream and tartar and gradually add the granulated sugar. Once all the sugar has been added, whip the egg whites until you reach stiff peaks. (You know you've reached stiff peaks when none of the whites fall out of the bowl if you put the bowl over your head)

Sift your dry ingredients into the egg whites. Then, gently fold the ingredients together. (You don't have to be extremely careful at this stage. You want to get some of the air out, but not enough to deflate the whole mixture.) This step is called macaronage. To see if you've mixed enough, put a dollop of the mixture onto a clean plate. If the batter spreads out within 10 seconds and doesn't have a peak, it's ready. If there is still a peak, keep mixing the batter for another 10-15 seconds.

Once your mixture is thoroughly mixed, pour the mixture into a piping bag. Pipe either 1 or 1.5 inch rounds onto a baking sheet lined with silipat or parchment paper.

The next step is crucial!
Let your piped macarons dry at room temperature for 1 hour. This step ensures that your macarons get a crispy exterior and form those lovely feet.

50 minutes into the drying process, preheat your oven to 300 degrees F.

After 1 hour, bake your macarons for 15-20 minutes. You want the shells to look glossy and opaque. Cool completely.


Nutella buttercream
ingredients: 
1 stick butter, softened
2 cups confectioners sugar
1/4 cup nutella
--------------------------------------------------------------------------
directions:


In a stand mixer, whip the butter until smooth. Slowly add the confectioners sugar. Whip until nice and airy, about 5 minutes. Add the nutella and keep whipping until the color is light brown and airy, about 3 minutes on medium speed.

Assembly: 
Fill the one shell with about 1 tablespoon of nutella buttercream. Sandwich another shell on top, twisting slightly as you go.

Viola! You have now made delicious french macarons!


Now...if your macarons don't come out as expected the first time, I advise you to never give up. It takes time and practice to perfect these little treats. Never get discouraged...and never have a mental break down like I did.

I really hope you give this recipe a try and I hope you're happy with the results.

Happy baking!


Saturday, April 7, 2012

Cinnamon Hazelnut Biscotti

It's been a while, hasn't it? I've been so busy with school and college apps....but I'm back!!! Even though I haven't been blogging recently, I still have been baking and cooking every chance I got. Recently I've been experimenting new recipes and I came across a recipe for cinnamon hazelnut biscotti.

I don't know why, but I've always been afraid of making biscotti. They just seemed like they would crumble and I would over bake them. So going into this, I had no idea what the outcome would be. But when they came out absolutely perfectly, I knew that there was no reason to be afraid of making biscotti anymore.


What I like about this recipe is that it's beyond simple. There a just a few ingredients but they pack a lot of flavor. The cinnamon really adds a nice aroma to the cookie and the scent that fills the air is heavenly. Trust me on this, you won't regret making this cookie. This will definitely be a recipe that you will use over and over.

On with the recipe!

Cinnamon Hazelnut Biscotti

makes 30 cookies
ingredients:
3/4 cup butter
1 cup white sugar
2 eggs
1 1/2 teaspoons vanilla extract
2 1/2 cups all-purpose flour
1 teaspoon ground cinnamon
3/4 teaspoon baking powder
1/2 teaspoon salt
1 cup hazelnuts, skinned
1 cup semi sweet chocolate chips (optional)
---------------------------------------------------------------------------------------------
directions:

Preheat oven to 350 degrees F(175 degrees C). Grease a cookie sheet or line with parchment paper.  

In a medium bowl, cream together butter and sugar until light and fluffy. Beat in eggs and vanilla. While the eggs are beating, in a separate bowl, sift together the flour, cinnamon, baking powder, and salt. Once the eggs have incorporated into the butter/sugar mixture, mix the dry ingredients into the egg mixture. Don't over beat. Stir in the hazelnuts. 

When all the ingredients are fully incorporated, shape the dough into two equal logs approximately 12 inches long. Place logs on baking sheet, and flatten out to about 1/2 inch thickness.  

Bake for about 30 minutes in preheated oven, or until edges are golden and the center is firm. Remove from oven to cool on the pans. When loaves are cool enough to handle, use a serrated knife to slice the loaves diagonally into 1/2 inch thick slices. Return the slices to the baking sheet. 

Bake for an additional 10 minutes, turning over once. Cool completely.

While the cookies are cooling, melt the chocolate chips over a double boiler or in the microwave. Once the chocolate is melted, spoon it over the cookies using a swinging motion.


I was so pleasantly surprised when they came out looking absolutely beautiful. My parents told me they found these to be the best biscottis they had ever eaten. They weren't overly sweet and the chocolate drizzle added just the perfect touch. I really do hope you try this recipe out. It's worth the time and effort.

Happy Baking!