Friday, July 20, 2012

My obsession and Oreo Cupcakes

I have an obsession. It's pretty bad really. I'm obsessed with baking. If my parents let me, I'd probably bake every single day. There's just something satisfying about baking and knowing that what I bake is tasty. Sometimes I feel empty inside if I have the urge to bake and I don't end up baking. This must sound silly but it's true. A few days ago that urge came back and I didn't ignore it this time...well that and the fact that there was a pack of left over oreos just sitting on my counter for a month. It was bothering me. I knew I had to use it because I didn't ever feel like just eating oreos. I never really like just eating oreos...I think it's the cream inside. What is it made out of anyway? It's so sweet and, well, gross. I've always been the kind of person to take the cream out and just eat the cookie portion of the oreo. Is that strange?

Anyway, instead of eating the oreos, I decided to make oreo cupcakes. I planned on making these cupcakes for a while now, but I tried my hardest to resist the urge to bake. Why? That's because every time I bake in the summer my dad gets mad at me for "making the house too hot." The funny thing is that he never complains when he finally gets a taste of what I baked.


These oreo cupcakes are really easy to make. They don't even require a stand mixer. You can just use an old-school whisk. The chocolate cake recipe I used came from The Butch Bakery Cookbook by David Arrick. It's a lovely book. The recipes are extremely easy to follow and the end results are to die for. All the cupcake recipes I've tried were moist and just sweet enough. I highly recommend you buy this book and try some of the recipes. The buttercream recipe also came from this book but I changed it up a little to suit this cupcake. I hope you give this recipe a try. 


Oreo Cupcakes
adapted from The Butch Bakery Cookbook
makes approx 16 cupcakes

ingredients:
3/4 cup water
1/2 cup unsweetened cocoa powder, sifted
1/4 cup plus 2 tablespoons semisweet chocolate chips
1 tablespoon espresso powder (this isn't necessary, but it brings out the chocolate)
1 cup plus 2 tablespoons all-purpose flour
1 cup plus 2 tablespoons sugar
3/4 teaspoon baking soda
1/2 teaspoon baking powder
1/2 teaspoon salt
2 eggs
1/4 cup vegetable oil
3 tablespoons Kahlua or other coffee-flavored liqueur (optional)
1 1/2 teaspoons vanilla extract  
16 oreos halves, with cream filling still attached 
---------------------------------------------------------------------------
directions:

Preheat the oven to 350°F. Line 2 muffin tins with cupcake liners. Twist Oreos in half and set aside the extra cookies for later. Place the side with cream filling in the bottom of each cupcake liner, cream-side facing up.

In a small saucepan, bring the water to a boil and remove from the heat. Stir in the cocoa powder, chocolate chips, and espresso powder, and stir until smooth. Set aside to cool, about 20 minutes.

In a medium-size mixing bowl, sift the flour, sugar, baking soda, baking powder, and salt. Whisk to combine. Add the eggs, oil, Kahlua (optional), vanilla, and the chocolate/espresso mixture to the bowl, whisking just until all of the ingredients are completely incorporated. 

Fill each prepared muffin cup 3/4 full. Bake, rotating the pans halfway through, until the tops are just firm to the touch and a tester inserted in the center of a cupcake comes out clean, about 20 minutes. Let the cupcakes cool completely before frosting, about 1 hour.  


Oreo buttercream
makes enough to top 16 cupcakes

ingredients:
1 stick unsalted butter, softened
3 cups confectioners' sugar, sifted
3 tablespoons milk
1/4 teaspoon vanilla extract 
l6 oreo halves, left over from the batter, finely crushed
---------------------------------------------------------------------------
directions:

Using an electric mixer on medium-high speed, beat the butter until light and fluffy, about 1 minute. Add the confectioners' sugar, milk, vanilla, and finely crushed oreos. Beat until smooth, creamy, and fluffy, about 2-3 minutes. 


Topping:
8 oreo cookies, split in half

Assembly:
Fill a piping bag fitted with a tip (I used an Ateco 808) and top each cupcake with buttercream. Then top each cupcake with an oreo half.


Congratulations! You have now successfully made delicious oreo cupcakes. There's just one question left to ask yourself-to share or not to share? The decision is yours. 

Happy Baking!  
    

Thursday, July 12, 2012

S'mores Ice Cream Sandwiches

I've been chasing this forever. I've been trying to get one of my posts published onto TasteSpotting for the longest time. So many failures and I'm really hoping that this post can make it onto it's newest *Feature*. What is the *Feature* you may ask? TasteSpotting is partnering up with Edy's Ice Cream for a celebration...after all, July is national ice cream month! As soon as I found out about this, I tried my best to come up with an interesting ice cream dish that I could post onto my blog and the website.

Here's my newest concoction.


S'mores Ice Cream Sandwiches. This recipe consists of chewy graham cookies, melted chocolate, and toasted marshmallow ice cream.


It took me two tries to make the ice cream. The first try was a complete disaster that left me very frustrated. I don't know what happened but the eggs curdled and everything just separated from each other. I threw the mixture into the sink and just stood their in anger and disappointment. After I gathered myself together, I decided to not give up and give the ice cream another try. The second try was a complete success!


The cookie resembles a snickerdoodle. In fact, I think it's basically a snickerdoodle. Who cares what it's called though. It's absolutely delicious nonetheless. As for the ice cream, you can definitely taste the toasted marshmallow. It has a nice spongy and fluffy texture due to the marshmallows. I substituted the vanilla bean for vanilla bean paste. There was a lot of vanilla flavor in the ice cream which I love. You can even see all the specks from the vanilla bean.


I highly recommend making the ice cream a day or two earlier. I made everything in one day and it took a long time for the ice cream to harden completely. I was in a big rush. Thankfully everything turned out just fine. These ice cream sandwiches even look like they could be sold in a shop.

Now...time for the main event. The recipe!


S'mores Ice Cream Sandwiches
makes approx 14 sandwiches


Chewy Graham Cookies
adapted from mykitchenaddiction
makes 28 1-ounce cookies

ingredients: 
3/4 cup (1 1/2 sticks) unsalted butter, softened
3/4 cup granulated sugar
1/2 cup dark brown sugar
1/4 cup honey
1 1/2 teaspoons baking powder
1 teaspoon ground cinnamon
1 teaspoon pure vanilla extract
1/2 teaspoon baking soda
1/2 teaspoon salt
1 egg
2 1/2 cups all purpose flour

topping: 
1/4 cup granulated sugar
1/4 teaspoon ground cinnamon
 ---------------------------------------------------------------------------
directions:

Preheat the oven to 375°F. Line a baking sheet with parchment paper, and set aside. 

Combine the ingredients for the topping in a small bowl and set aside.  

For the cookie dough, cream together the butter, sugar, brown sugar, honey, baking powder, cinnamon, vanilla, baking soda, and salt.  Add the egg and beat until incorporated into the creamed mixture. Stir in the flour.

Form the dough into 1-ounce portions, roll them into balls, and dip them in the topping mixture.  Place each one on the prepared cookie sheet. Bake for 9-10 minutes, until the cookie is just set and golden brown.

Allow the cookies to cool. Once they are cooled, spread about 1 teaspoon of melted chocolate onto the bottom of each cookie and let the chocolate solidify. Set aside until ready to use.


Toasted Marshmallow Ice Cream
makes approx 1 quart

ingredients: 
10 oz bag marshmallows
1 vanilla bean (I used 2 teaspoons of vanilla bean paste)
2 cups milk (I used 1%)
5 large egg yolks
scant 1/2 cup sugar
pinch salt
1 cup heavy cream
1 teaspoon vanilla  
---------------------------------------------------------------------------
directions:

Spread the marshmallows in a single layer on a parchment-lined baking sheet. Toast the marshmallows with a kitchen torch, flipping them to toast all sides (be careful when flipping, they'll be hot). If you don't have a torch, you could probably also toast the marshmallows using the flame on a gas stove or under the broiler in your oven. If you use the broiler, keep a close eye on the marshmallows. Set the marshmallows aside.

Use a small paring knife to split the vanilla bean down the middle. Scrape the bean with the back of the knife to remove the seeds. Add the seeds and the vanilla bean to a medium saucepan along with the milk. Set over medium heat and bring the mixture to a simmer.

Meanwhile, whisk the egg yolks, sugar, and salt in a heatproof bowl. Slowly add the warm milk mixture to the egg yolks, whisking constantly. Pour back into the saucepan and set over medium-low heat. Stir constantly until the mixture thickens enough to coat the back of a wooden spoon (about 170-175 F on an instant read thermometer). Strain the custard into a heatproof bowl.

Let the mixture cool for a few minutes (you can stir it vigorously to cool it faster). Add the toasted marshmallows to your blender, and once it's cooled slightly, add the custard to the blender too (my blender was almost filled to the top, but it worked out fine - you could do it in batches if you'd rather). Blend until the marshmallows are completely broken down and the mixture is smooth. Add the heavy cream and vanilla to the blender and blend to combine.

Transfer the mixture to a bowl, cover with plastic wrap and refrigerate until thoroughly chilled (overnight is best). Before churning, whisk the mixture vigorously until the custard is smooth and has a pourable consistency (it might be slightly spongy when you first pull it from the fridge). Freeze in your ice cream maker according to the manufacturer's instructions. Transfer to airtight container and freeze until firm, at least 2 hours.
---------------------------------------------------------------------------
assembly:

Take two of the chocolate-dipped graham cookies and sandwich a heaping 1/4 cup of the toasted marshmallow ice cream. Enjoy!


It takes a lot of time to make this recipe but that's mainly because of the freezing time for the ice cream.  It's very much worth the time and effort because this tasted a lot like a delicious s'mores sandwich you'd make over the campfire. I highly recommend you make this and share it with your friends and family....or don't :)

Until next time....Happy Baking!


Wednesday, June 13, 2012

Samoas Cupcakes

I can guarantee that I'm not the only one who secretly loves Girl Scout cookies. My favorite?...Samoas! I love the wonderfully rich vanilla cookie and the chewy chocolate coconut coating. I think what really makes it is the chocolate coating and drizzle. It just ties everything together and makes the cookie oh-so delicious.


There are a lot of bloggers who have already made their cupcake version of the popular cookie. At first I wanted to make the recipe from Top with cinnamon. Izy is only 16, but her food looks so sophisticated and delicious. However, after thinking for quite some time, I decided to make my very own original recipe. I was building on recipes. I used Magnolia bakery's vanilla cupcake, chocolate ganache, and Rosie's caramel swiss meringue buttercream from Sweetapolita. You should check out both blogs. They're absolutely wonderful. 


These cupcake took some time, but mostly because of cooling time. There are a lot of different parts to the recipe, but overall it's not a difficult cupcake to make. It consists of: vanilla cake, whipped chocolate ganache filling, chocolate ganache coating, toasted coconut rim, and caramel buttercream.


Samoas Cupcakes
makes 24 cupcakes

ingredients: 

cake: 
1 1/2 cups self-rising flour
1 1/4 cups all-purpose flour
1 cup (2 sticks) unsalted butter, softened
2 cups sugar
4 large eggs, at room temperature
1 cup milk
1 teaspoon vanilla extract
---------------------------------------------------------------------------
directions:
Preheat oven to 350 degrees F.

Line 2 (1/2 cup-12 capacity) muffin tins with cupcake papers.

In a small bowl, combine the flours. Set aside.

In a large bowl, on the medium speed of an electric mixer, cream the butter until smooth. Add the sugar gradually and beat until fluffy, about 3 minutes. Add the eggs, 1 at a time, beating well after each addition. Add the dry ingredients in 3 parts, alternating with the milk and vanilla. With each addition, beat until the ingredients are incorporated but do not over beat. Using a rubber spatula, scrape down the batter in the bowl to make sure the ingredients are well blended. Carefully spoon the batter into the cupcake liners, filling them about 3/4 full. Bake for 20 to 25 minutes, or until a cake tester inserted into the center of the cupcake comes out clean.

Cool the cupcakes in tins for 15 minutes. Remove from the tins and cool completely on a wire rack before icing. 


chocolate ganache:
adapted from Sweetapolita
4 oz milk chocolate
4 oz dark chocolate (I used 60% cacao) 
1 cup heavy cream
---------------------------------------------------------------------------
directions:
In a heavy saucepan, heat the cream until it's gently simmering. Once it's simmering, pour it over the chocolate. Set aside until room temperature and thickened. 


caramel buttercream:
1 cup sugar
1/4 cup water
1/4 cup  heavy cream
1 1/2 cups unsalted butter, at room temperature
4 large egg whites
1 teaspoon pure vanilla extract
---------------------------------------------------------------------------
directions:
Place 1/2 cup + 2 tablespoons of the sugar and the water in a medium saucepan to a boil over medium heat. Brush down the sides of the pot with a dampened pastry brush to prevent sugar crystals from forming. Stop stirring and cook until caramel is dark amber, gently swirling from time to time. Remove from heat, and slowly add cream, whisking by hand until smooth. It will be splatter, so be careful. Whisk in sea salt and vanilla. (I left out these two ingredients) Let cool.

Place butter in an electric mixer fitted with the paddle attachment and beat on medium speed, until pale and fluffy, about 3-5 minutes. Transfer to a large bowl and set aside.

Wipe the bowl of an electric mixer clean with lemon juice, and place egg whites and remaining sugar into bowl over a pot of simmering water (not boiling–you don’t want to cook the eggs). Whisk occasionally and gently until sugar dissolves and mixture registers 160° on a candy thermometer.

Remove the bowl from heat, and place back onto the mixer fitted with the whisk attachment. Whisk on medium speed for 5 minutes. Increase speed to medium-high, and whisk until stiff, glossy peaks form (about 5-6 minutes). Once the bottom of the bowl is neutral and no longer warm to the touch, reduce speed to medium-low, and add beaten butter, one cup at a time, whisking well after each addition.

Switch to paddle attachment. With mixer on low speed, add cooled caramel, and beat until smooth (about 3-5 minutes).

 
Toasted Coconut:
Spread 1 cup of shredded coconut in a thin layer on a baking sheet. Bake at 300F for about 20 minutes, stirring every 5 minutes to make sure that the coconut browns evenly.


Assembly:
Using a small paring knife, or cupcake corer, core out the middle of the cupcake and either discard or eat. Fill the core with 1/2 of the ganache. (I took the amount and chilled it, then whipped it slightly.) Dip the cupcake into the remaining ganache. Rim the cupcake with toasted coconut. Let the ganache set for about 25 minutes. Once the ganache is set, top the cupcake with the caramel swiss meringue buttercream. (I used an Ateco #827 tip.)


These cupcakes are definitely bake-sale worthy. I think you could even fool people into thinking you bought them from a bakery. I really hope you do try this recipe. You'll absolutely love it! 

Happy Baking! 


Tuesday, June 12, 2012

Ultimate Chocolate Chip Cookies

For the longest time, I've been searching for the ultimate chocolate chip cookie recipe. I've tried countless recipes, each better than the last. For a while now I've declared Deb's recipe from Smitten Kitchen the best chocolate chip cookie ever. Well I'm sad and happy to say that I've found a new recipe that is by far the greatest chocolate chip cookie I've ever had and made. Where did I find this recipe, you may ask? I found it from the most boring place you could look for.....the New York Times. Me being your average teenager, I find the newspaper to be extremely boring, especially the NYT. Never would I have expected to find such a fantastic recipe from a newspaper.

What makes these cookies so special is that they require both cake flour and bread flour. They're two ingredients that most people don't have in their pantry. Luckily I did have KAF bread flour hiding in my pantry. As for the cake flour, it was nowhere to be found. However, you can easily substitute cake flour with AP flour and cornstarch*. I bet you could just use AP flour but I don't think the cookies would have the same texture or shape. They just wouldn't be as delicious.

I decided to put on a little experiment. I wanted to see how the cookies were different after different intervals of chilling the dough. According to the recipe, this dough can be chilled for up to 72 hours. I baked off my cookies after 1 hour, 24 hours, and 48 hours.


I baked this cookie after chilling the dough for only 1 hour. It tasted delicious, but wasn't amazing. It was just missing something.


I baked this cookie after 24 hours. The texture was chewier than the 1 hour-chilled cookie. There was also a much richer flavor, but it still seemed like it was missing something.


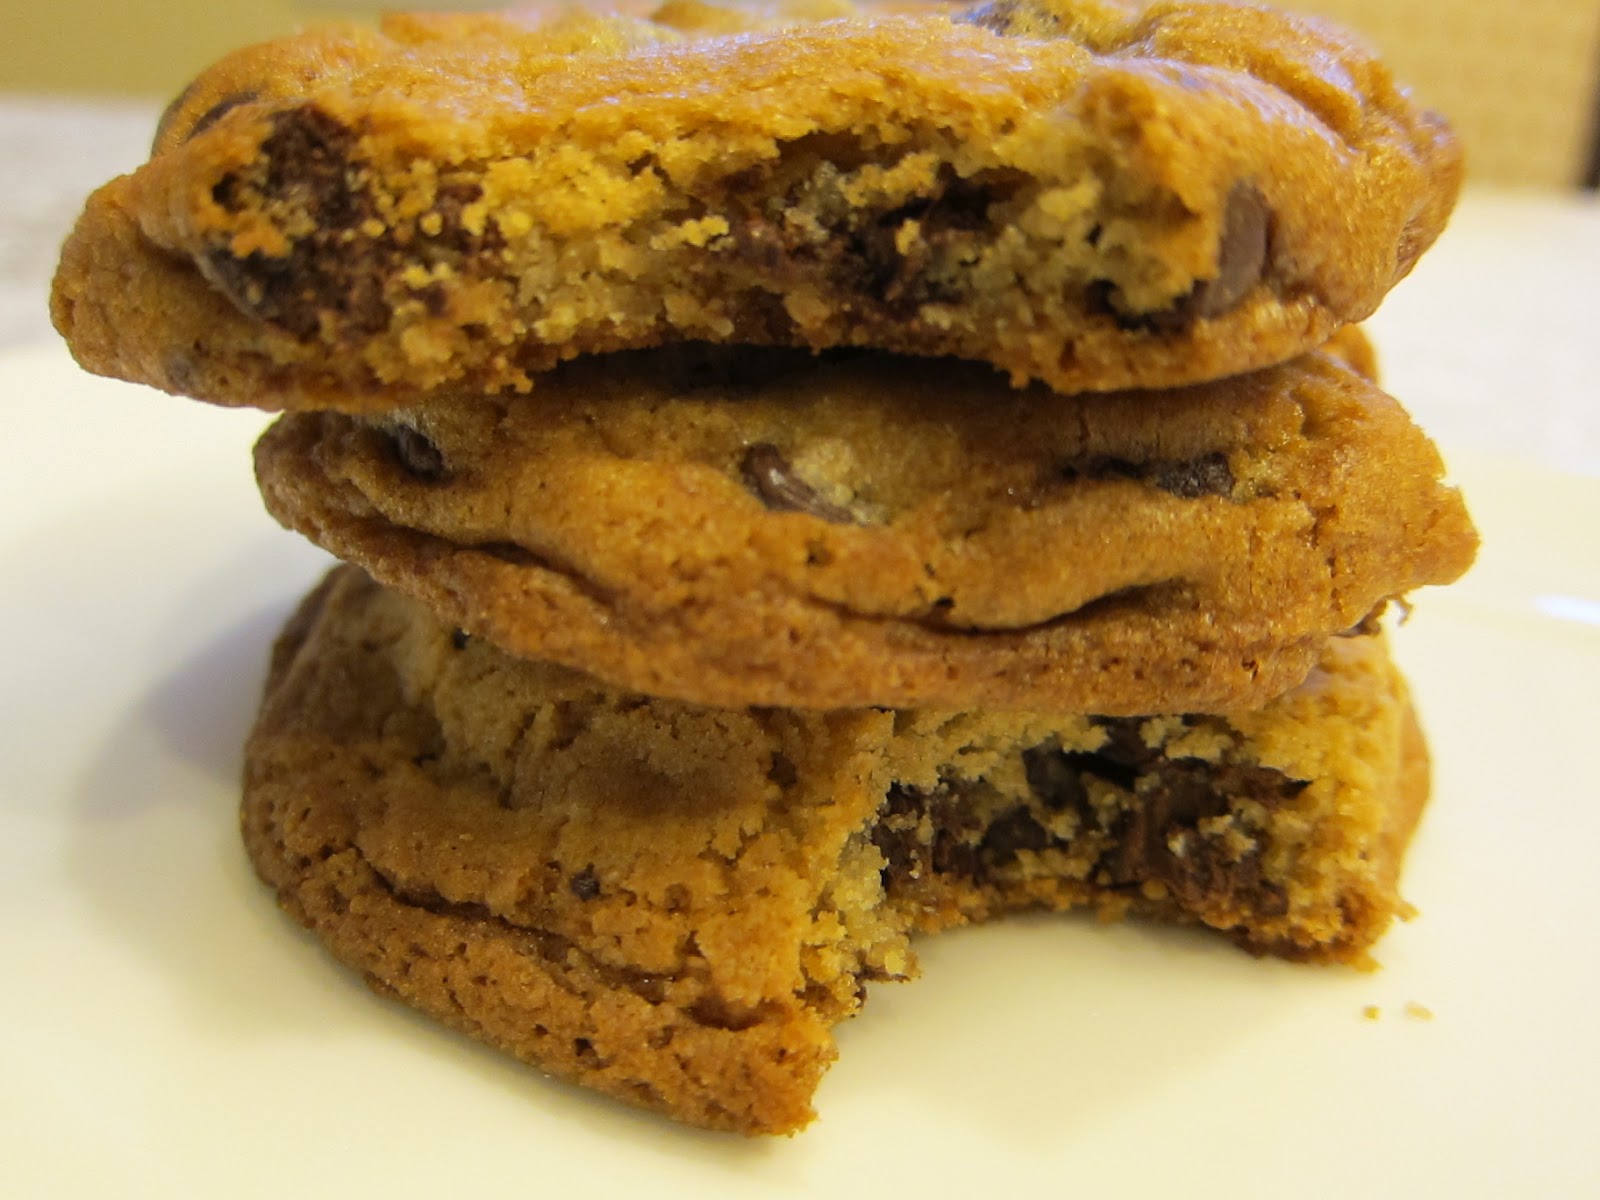
This cookie was the winner. It had a wonderful crisp exterior and delectable chewy interior. It had the best color and the texture was out of this world. Chilling for 48 hours is definitely the secret to this recipe. 


You can just see the difference in the three cookies. The 48 hour-chilled cookie is much darker and the edges are more defined. It was just so much more delicious. I weighed out all these cookies and baked them for the same amount of time. They were all 5.2 ounces. I made all the other cookies 3 ounces. I even packaged some of them for my teachers for the last day of school. 


Here's the recipe!

New York Times Chocolate Chip Cookies
makes 18 very large cookies or 31 smaller cookies

ingredients:
2 cups minus 2 tablespoons (8 1/2 ounces) cake flour
1 2/3 cups (8 1/2 ounces) bread flour
1 1/4 teaspoons baking soda
1 1/2 teaspoons baking powder
1 1/2 teaspoons coarse salt (I used sea salt)
1 1/4 cups unsalted butter (2 1/2 sticks)
1 1/4 cups (10 ounces) packed light brown sugar
1 cup plus 2 tablespoons (8 ounces) granulated white sugar
2 large eggs
2 teaspoons vanilla extract
20 ounces bittersweet chocolate chips (I used semi-sweet)
extra chocolate chips, optional
sea salt (optional)

-------------------------------------------------------------------
directions:

Sift together the dry ingredients (flour through salt). I just scraped mine through a fine strainer/sieve since my sifter isn't all that great. Set aside.

Use an electric mixer to combine the butter and sugars- mixing until the mixture is very light, about 5 minutes. Mix in the eggs, one at a time. Add the vanilla. Reduce the speed to low, add the dry ingredients and, mix just until the dry ingredients are incorporated. Stir in the chocolate chips. Place the dough in an airtight container and refrigerate a minimum of 24 to 36 hours before baking (and up to 72 hours).

Preheat oven to 350 degrees F. Line baking sheets with parchment paper or silpat mats. For 5-inch cookies, scoop six 3.25 ounce mounds of dough- giant golf ball-sized (I rolled mine into balls) onto a baking sheet, spacing them evenly apart. Don't try to fit more on the sheet or you'll end up with cookies baking into each other. Dot some extra chocolate chips on top, if desired. Sprinkle each ball of dough with a small pinch of sea salt, if desired.

Bake until the edges are golden brown and the center is lighter and soft, 18 to 20 minutes. Let the cookies cool on the baking sheet for about 15 minutes, then transfer the cookies to a rack and let them cool completely. Repeat with the remaining cookie dough.


I really do hope you try making these cookies. The recipe itself is extremely simple. The only "tough part" about this recipe is the waiting period. As I always say, the wait is well worth it. These cookies are fantastic! I highly recommend you try making these cookies. You won't regret it.

Happy Baking!


*For every 1 cup of AP flour, take out 2 tablespoons and replace those 2 tablespoons with 2 tablespoons of cornstarch.

Tuesday, May 15, 2012

Frosted Sugar Cookies

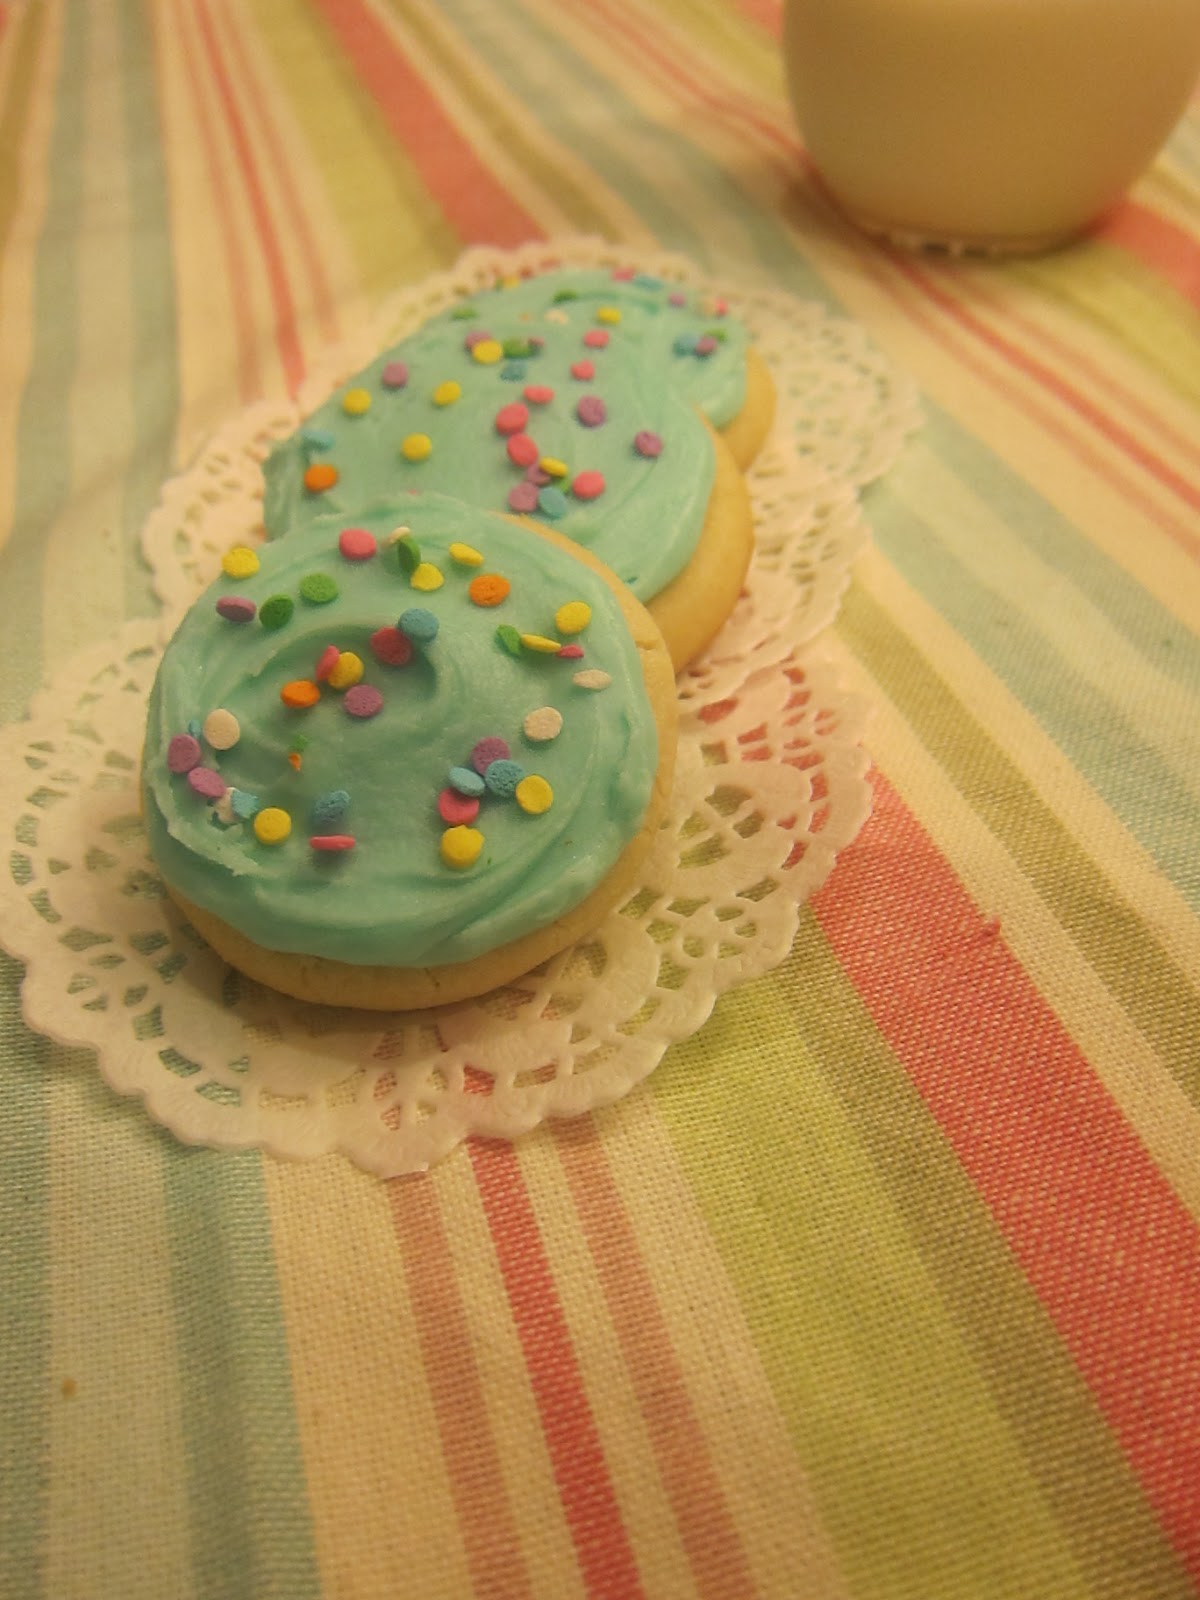
Every time I walk into my local Waldbaum's I see these wonderful looking cookies. They're soft and chewy sugar cookies frosted with bright and vibrant frosting. They look so adorable and festive, especially when topped with sprinkles. Each time I want to buy a pack and devour them all...but my conscience tells me not to, so I listen to it.


But one day, when I was home with nothing to do, I had the greatest desire to make these festive treats. So I did. And they were delicious. They're chewy, soft, and not overly sweet. The frosting adds just the right amount of flavor. Let's face it...frosting makes everything better. Just like bacon.

I wish I could say that this is my own original recipe, but sadly it is not. I borrowed this recipe from the lovely Annie of Annie's Eats. I love her blog and her recipes are easy and delicious. She's also an excellent photographer. The pictures she takes make her food look just that much more delectable.

Well, I guess it's time for the recipe. It's extremely simple, but it requires that you chill the cookies for 1 hour. I know, I know. A whole extra hour of waiting is needed in order to dig into these cookies. You must resist temptation, however, because the chill-time is what gives these cookies such great texture.


Frosted Sugar Cookies
makes about 2 dozen cookies

Cookie
ingredients: 
4½ cups all-purpose flour
4½ tsp. baking powder
¾ tsp. salt
1½ cups (3 sticks) unsalted butter, at room temperature
1½ cups sugar
3 large eggs
5 tsp. vanilla extract
--------------------------------------------------------------------------
directions:

for the cookies: preheat the oven to 350˚ F.  Line baking sheets with parchment paper or silicone baking mats.  In a medium bowl combine the flour, baking powder and salt, and whisk together to blend.  In the bowl of an electric mixer, combine the butter and sugar and beat together on medium-high speed until soft and fluffy, about 2-3 minutes.  Beat in the eggs one at a time, mixing well after each addition and scraping down the bowl as needed.  Blend in the vanilla.  With the mixer on low speed, add in the dry ingredients mixing just until incorporated and evenly mixed.  Cover and chill the dough for 1 hour.

When you are ready to bake the cookies, scoop a scant quarter cup of dough and roll into a ball.  Flatten the ball slightly and place on the prepared baking sheet. Repeat with the remaining dough, spacing the cookies at least 2-3 inches apart. Bake about 10-12 minutes or just until set.  (Do not overbake!  The edges should be no more than very lightly browned if at all.)  Let cool on the baking sheet for several minutes.  Transfer to a wire rack to cool completely.

Frosting
ingredients: 
5 cups confectioners’ sugar, sifted
1/3 cup (5 1/3 tbsp.) unsalted butter, melted
1 tbsp. vanilla extract
7-8 tbsp. milk (plus more, as needed)
Food coloring (optional)
Sprinkles (optional)
--------------------------------------------------------------------------
directions:
To frost the cookies, place the confectioners’ sugar in a medium bowl.  Add the melted butter, vanilla, and milk to the bowl and whisk until smooth.  Whisk in additional milk as necessary, 1 teaspoon at a time, until you reach your desired consistency.  Tint with food coloring if desired.  Use an offset spatula or spoon to frost the cooled cookies.  (If the frosting begins to thicken as you decorate, just continue to whisk in small amounts of milk to keep it workable.)  Top with sprinkles if desired.  Store in an airtight container.


If you do choose to make these cookies, which I highly recommend you do, don't share them with your friends. You'll never be able to taste one. They'll sell out instantly. Trust me, I made that mistake. They're absolutely delicious and buttery. You won't be able to make them just once.

Happy Baking!

Friday, May 4, 2012

French Macarons

They should change the phrase to, "fourth time's the charm." That's how many times it took me to finally be able to make a decent looking macaron. For years I've been fascinated with these little french treats, but I've been too afraid to make them myself. But recently, I've been obsessed and I had to give them a try.

The perfect macaron consists of three key aspects: 
1. They must have feet! It's the key to a beautiful looking macaron. It's what makes you do a double take when you pass by a french patisserie.
2. The exterior must be crunchy and glossy! You know you have a beautiful macaron when the exterior shell has a good crunch when you bite into it. Also, they must have a nice shine to it. Food is half aesthetics....isn't it?
3. The interior should have a soft, meringue texture! A perfect macaron always has a smooth and chewy interior. It should be soft but still have a nice bite to it.


My first attempt was a total flop. The macarons were mishapen, deflated, and lacked the proper "feet." The had a nice chew inside, but the shells were cracked and they looked like they had just been through an earthquake. The next two attempts were no more successful than the first. Both times I became so frustrated that I threw the batter into the sink in rage. After the third attempt, I swore to myself that I would never make macarons again. Then came Thursday, May 3, 2012.

I spent most of the night studying macarons. I watched all the videos and learned all the proper techniques: don't over whip your egg whites, make sure to use room temperature egg whites, weigh your ingredients, add a pinch of cream of tartar into your egg whites to help stabilize them, let your piped shells rest for 1 hour to create a proper coating. After having watched all those tutorials, my will power had diminished. I had to try one more time. I knew that I would succeed this time...I simply had to.

The final result? Why don't you see for yourself?


I finally made beautiful macarons with feet, a crispy exterior, and a chewy interior. They had great flavor and were the perfect late-night snack. I was so happy that I literally took a victory lap around my kitchen.

If you're a brave soul and you want to try to make your own macarons, here's the recipe. I used Dulce Delight's recipe:


Hazelnut macarons with Nutella buttercream
adapted from Dulce Delight

Shell
ingredients:
55g raw almonds
55g raw hazelnuts
200g confectioners sugar
2 tbsp cocoa powder
90g egg whites- aged for 2 days in your refrigerator 
pinch of cream of tartar
40g granulated sugar
--------------------------------------------------------------------------
directions:

Grind the almonds, hazelnuts, confectioners sugar, and cocoa powder in a food processor. Pulse until everything is finely ground and well mixed.

Using a stand mixer, whip the aged egg whites until frothy. Once they become frothy, add a pinch of cream and tartar and gradually add the granulated sugar. Once all the sugar has been added, whip the egg whites until you reach stiff peaks. (You know you've reached stiff peaks when none of the whites fall out of the bowl if you put the bowl over your head)

Sift your dry ingredients into the egg whites. Then, gently fold the ingredients together. (You don't have to be extremely careful at this stage. You want to get some of the air out, but not enough to deflate the whole mixture.) This step is called macaronage. To see if you've mixed enough, put a dollop of the mixture onto a clean plate. If the batter spreads out within 10 seconds and doesn't have a peak, it's ready. If there is still a peak, keep mixing the batter for another 10-15 seconds.

Once your mixture is thoroughly mixed, pour the mixture into a piping bag. Pipe either 1 or 1.5 inch rounds onto a baking sheet lined with silipat or parchment paper.

The next step is crucial!
Let your piped macarons dry at room temperature for 1 hour. This step ensures that your macarons get a crispy exterior and form those lovely feet.

50 minutes into the drying process, preheat your oven to 300 degrees F.

After 1 hour, bake your macarons for 15-20 minutes. You want the shells to look glossy and opaque. Cool completely.


Nutella buttercream
ingredients: 
1 stick butter, softened
2 cups confectioners sugar
1/4 cup nutella
--------------------------------------------------------------------------
directions:


In a stand mixer, whip the butter until smooth. Slowly add the confectioners sugar. Whip until nice and airy, about 5 minutes. Add the nutella and keep whipping until the color is light brown and airy, about 3 minutes on medium speed.

Assembly: 
Fill the one shell with about 1 tablespoon of nutella buttercream. Sandwich another shell on top, twisting slightly as you go.

Viola! You have now made delicious french macarons!


Now...if your macarons don't come out as expected the first time, I advise you to never give up. It takes time and practice to perfect these little treats. Never get discouraged...and never have a mental break down like I did.

I really hope you give this recipe a try and I hope you're happy with the results.

Happy baking!